Computer Assembly - How To Assemble A PC
Install The DVD RW Drive
The next boot test will be done after the drives are installed, namely the hard drive and optical drive, such as a DVD RW drive. Most computers do not need more than this. A single hard drive provides a vast amount of storage space. USB thumb drives are more convenient and easier to use than a floppy drive for comparable type operations, such as copying files. And the DVD RW drive handles both DVD's and CD's.
CD and DVD type drives are optical drives. If you are installing more than one optical drive, i.e., two optical drives, then they should be installed on the same IDE ribbon cable, one as the master and the other as the slave. The writable optical drive, such as a DVD RW drive, should be installed as the master since a writable optical drive needs a continuous flow of data to reliably burn CD's or DVD's. If there is an additional read-only optical drive then it should be installed as the slave. If you are installing two writable optical drives then the more critical, higher capacity drive should be installed as the master, so a DVD RW as master and a CD RW as slave.
An IDE ribbon cable is either an 80-wire IDE ribbon cable or a 40-wire IDE ribbon cable. An optical drive with an IDE connector is made to use a 40-wire IDE ribbon cable, but will work just fine and perform the same if connected with an 80-wire IDE ribbon cable. The connectors for the 40-wire IDE ribbon cable and 80-wire IDE ribbon cable are identical on both the motherboard and the back of the drive.
Unplug everything from the rear of the computer, including the power cord, monitor cable, keyboard cable, and mouse cable.
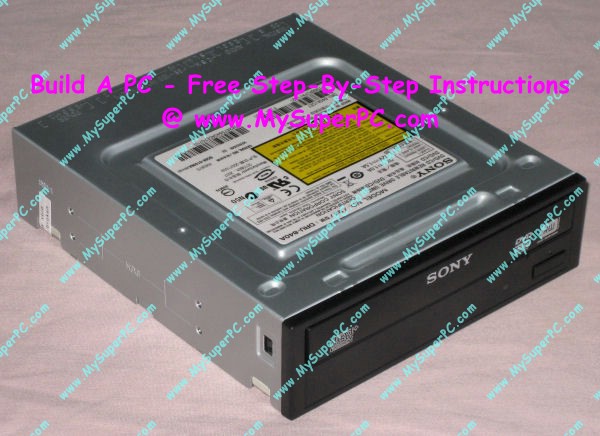
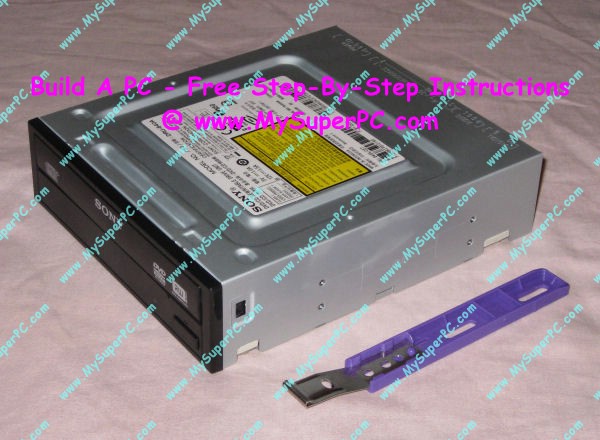
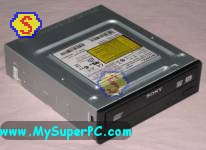
Since I'm using a black computer case and the Sony DVD RW drive I'm using comes with a beige faceplate (bezel) pre-installed, I'm going to change it out with the black bezel that came with the drive. I have a page where I detail the steps describing How To Change The Front Panel on the DVD RW drive. Of course, this is purely for appearances. In fact, the computer case I'm using has a door for the optical drives, so the DVD RW drive is not visible most of the time, anyway. After changing the bezel, the drive looks like this.
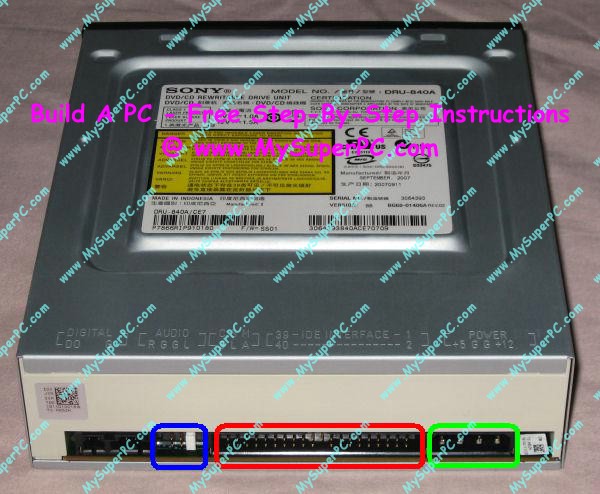
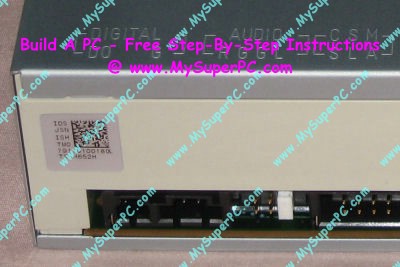
A rear view of the Sony DVD RW looks like this. The blue circle on the left is the jumpers. The next two circles indicate connections that need to be made. The red circle in the middle is the IDE socket for the IDE ribbon cable. The green circle on the right is the power receptacle for the 4-pin power plug coming from the power supply.
The jumper setting defaults to the "Master" setting out of the retail box. As a DVD RW device, it's unlikely that it would be best for the drive to be configured as the "Slave". The positioning of the jumper for different configurations is etched on the top of the drive along the back edge. The third set of etched letters is for the jumpers. The letters run vertically in this set. There are three pairs of letters, corresponding to the three jumper pins, CS for Cable Select, SL for Slave and MA for Master. So the white jumper should be on the third jumper pin to configure the drive as the Master.
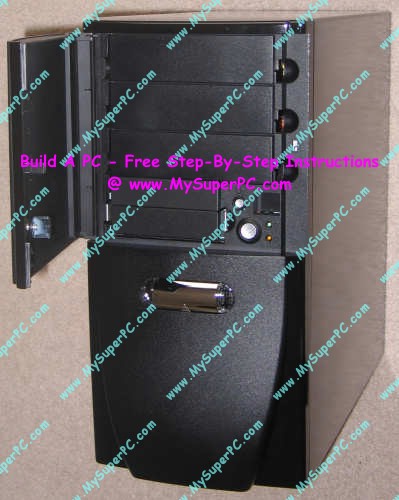
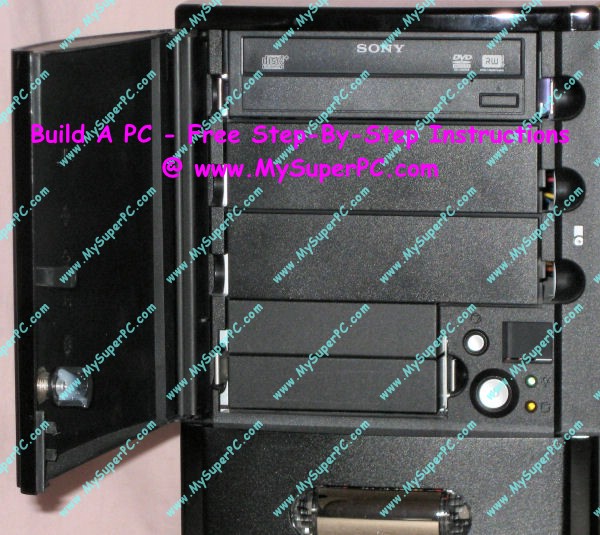
Here is how the computer case looks at this point. The side panel that can't be seen is still removed from the computer case. It was left off during the first boot so the fans could be observed during the boot.
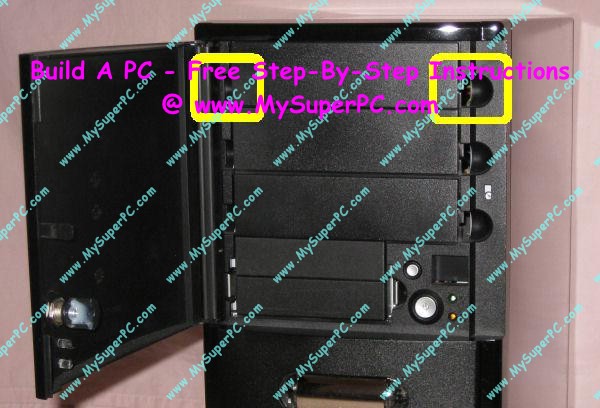
The top three bays in the computer case are for 5" drives, namely optical drives such as the DVD RW. To remove a faceplate, use the finger holes to squeeze the tabs holding the faceplate, detaching it.
Like so.
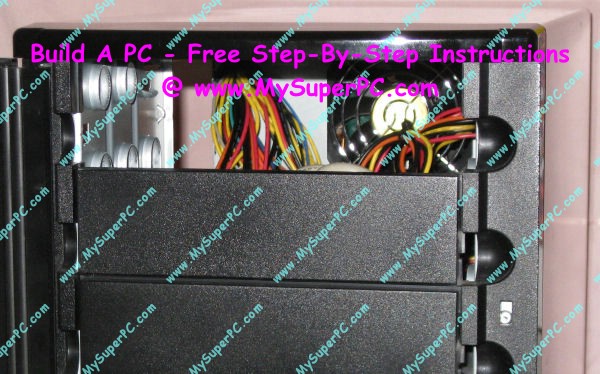
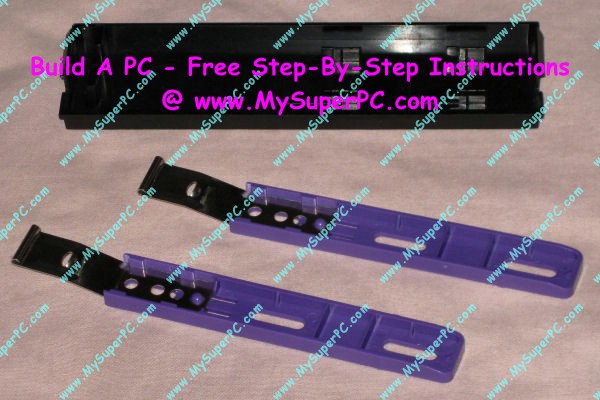
Attached behind the black 5.25 inch bay cover that has just been removed are two drive rails.
They pop right off from the back of the bay cover.
The drive rails mount on the side of the DVD RW drive. Notice there are two pairs of holes on the side of the DVD RW drive. The drive rail needs be secured using either the top pair or bottom pair. But only one pair will allow the drive to mount properly inside the computer case. For me, it is the bottom pair that should be used. If the wrong pair is used then the drive will not slide back into the computer case with the drive rails mounted.
The drive rails are secured to the side of the DVD RW drive using the mounting screws that came in the DVD RW retail box.
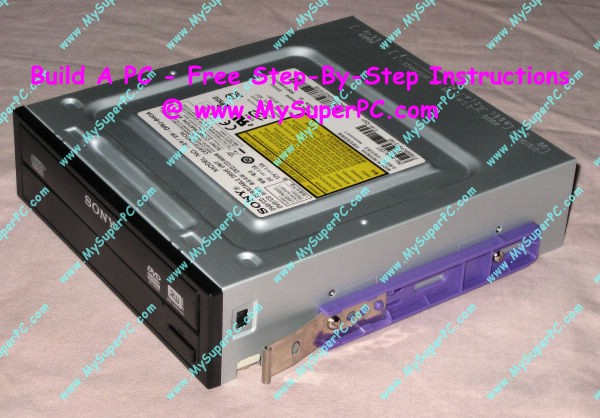
Attach a drive rail to each side of the DVD RW drive. There is more than one hole in the drive rail which can be used to secure the drive rail to the DVD RW drive. Again, it's a matter of trial-and-error to see which hole is best. If the wrong hole is used then the front of the DVD RW drive will not be flush with the other 5.25 inch drive bays when it is mounted inside the computer case. It's important that the drive is properly secured since the next step is to plug in connectors to the back of the drive. The drive needs to be secure since some pressure is required to ensure the power connectors are fully in place.
Slide the Sony DVD RW drive with the drive rails attached back into the open 5.25 inch drive bay. If the drive rails were attached properly then it should slide right in, clicking into place, and the front of the DVD RW drive should be flush with the rest of the bays.
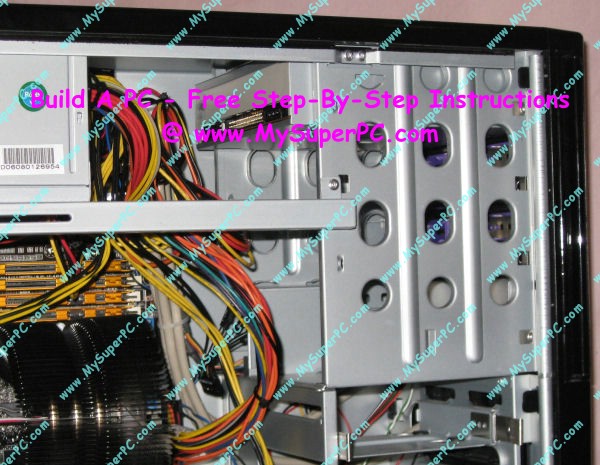
This shows the back of the Sony DVD RW drive inside the computer case with no connections yet made to the back of the drive.
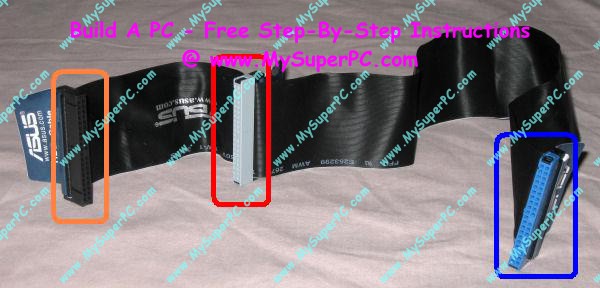
An 80-pin IDE ribbon cable is included in the retail box of the ASUS M2N32-SLI Deluxe Wireless Edition motherboard. It is of the standard length of 18 inches. Although longer 40-pin or 80-pin IDE ribbon cables exist, it's best not to use them unless absolutely necessary. The two connectors that are close together at one end of the IDE ribbon cable are the master and slave connectors. The master connector is on the end of the cable and I've circled it in orange (leftmost in the picture). The connector close to it is the slave connector and I've circled it in red. The connector at the other end of the cable, circled in blue (rightmost in the picture), is for the motherboard. The paper label attached to each connector should be removed.
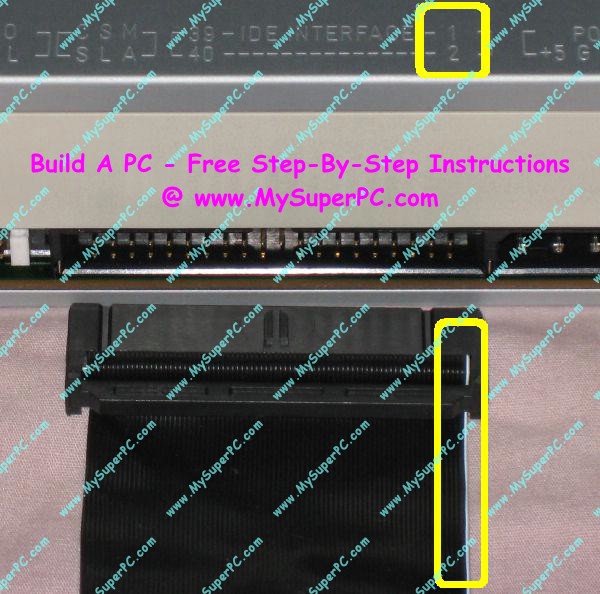
Connect the IDE ribbon cable to the back of the DVD RW. The master connector on the IDE ribbon cable should be used since the DVD RW drive is the first (and only) drive for the IDE ribbon cable. The connection is keyed so it should only be possible to plug it in one way into the IDE ribbon cable socket in the back of the DVD RW drive, but as keys go it's not so great and it's possible to unknowingly plug it in incorrectly, and I should know because I've done it myself. To be really sure it's connected properly, verify the pin 1 marking on the DVD RW drive (circled in yellow) aligns with the stripe marking the pin 1 of the cable (also circled in yellow). The enlarged picture shows both very well.
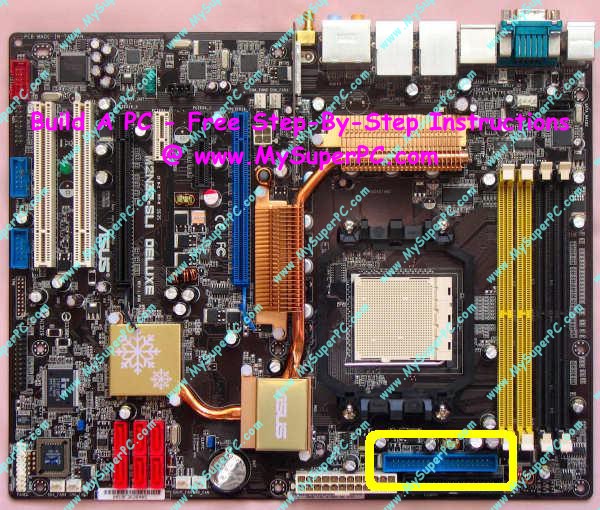
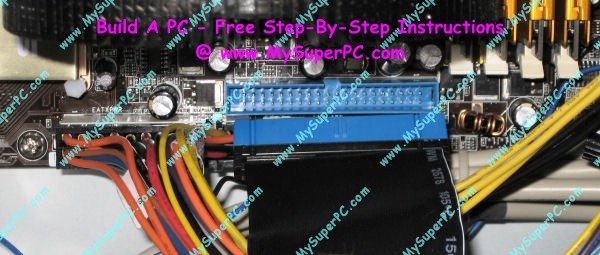
Connect the other end of the IDE ribbon cable, the end with the blue connector, to the motherboard. The cable connects to the IDE socket on the ASUS M2N32-SLI Deluxe Wireless Edition motherboard, shown circled in yellow.
Plug the IDE ribbon cable into the IDE socket on the motherboard. The connector is keyed so it can only be plugged in one way.
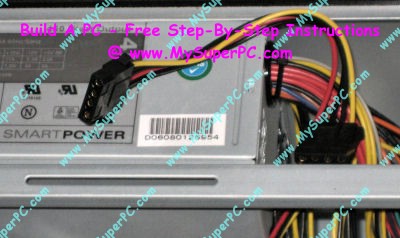
Select one of the 4-pin power connector from the bundle of power connectors coming out of the power supply like the one shown.
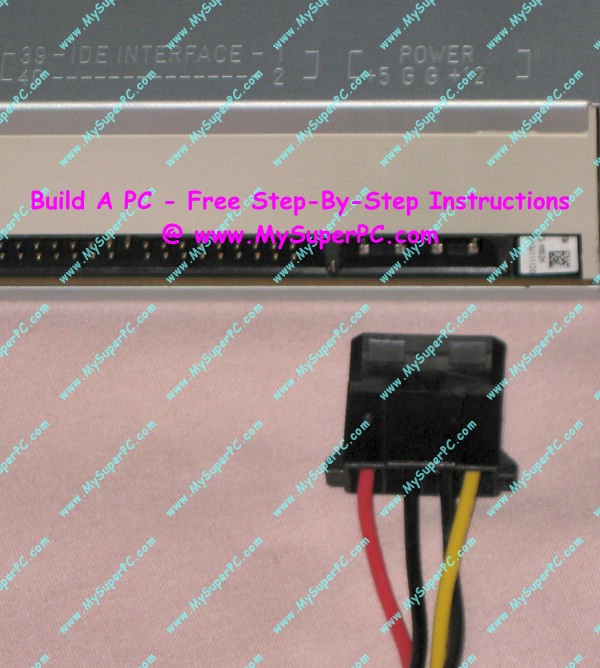
Connect the 4-pin power connector to the back DVD RW drive in the power receptacle. The connection is keyed so it can only plug in one way.
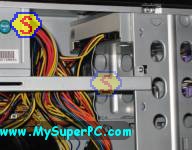
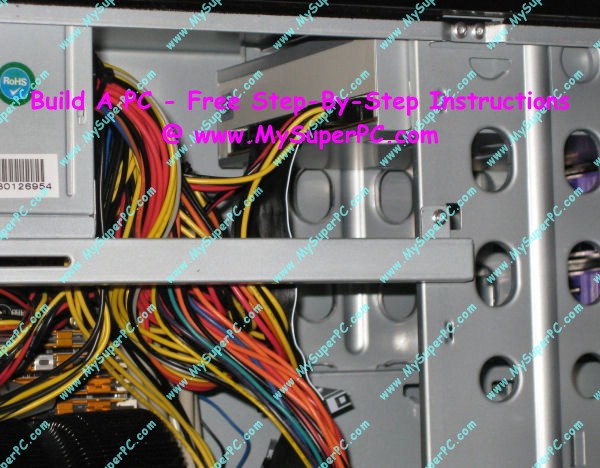
Here is how the back of the Sony DVD RW drive looks inside the computer case with these two connections made to the back of the drive.
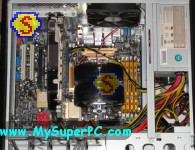
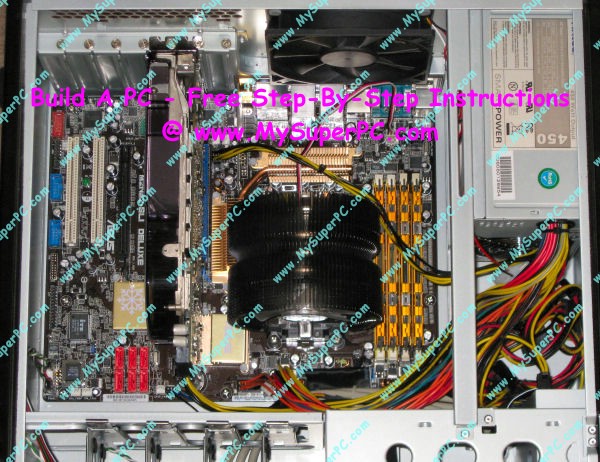
And here's how the inside of the computer looks with the optical drive installed.
Back to My Super PC - Home Page
How To Build A Computer. Step By Step Instructions To Assemble. Skip To Any Assembly Step.
Back to My Super PC - Home Page
© 2001-2010, Rob Williams, all rights reserved.
|

|
 The jumper setting defaults to the "Master" setting out of the retail box. As a DVD RW device, it's unlikely that it would be best for the drive to be configured as the "Slave". The positioning of the jumper for different configurations is etched on the top of the drive along the back edge. The third set of etched letters is for the jumpers. The letters run vertically in this set. There are three pairs of letters, corresponding to the three jumper pins, CS for Cable Select, SL for Slave and MA for Master. So the white jumper should be on the third jumper pin to configure the drive as the Master.
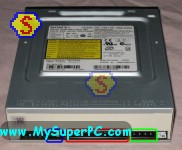 Here is how the computer case looks at this point. The side panel that can't be seen is still removed from the computer case. It was left off during the first boot so the fans could be observed during the boot.
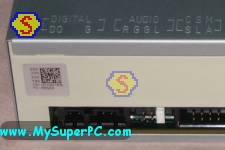 The top three bays in the computer case are for 5" drives, namely optical drives such as the DVD RW. To remove a faceplate, use the finger holes to squeeze the tabs holding the faceplate, detaching it.
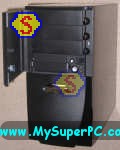 Like so.
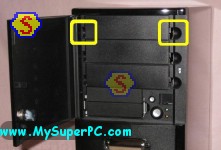 Attached behind the black 5.25 inch bay cover that has just been removed are two drive rails.
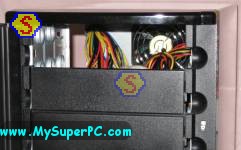 They pop right off from the back of the bay cover.
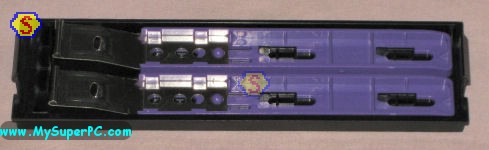 The drive rails mount on the side of the DVD RW drive. Notice there are two pairs of holes on the side of the DVD RW drive. The drive rail needs be secured using either the top pair or bottom pair. But only one pair will allow the drive to mount properly inside the computer case. For me, it is the bottom pair that should be used. If the wrong pair is used then the drive will not slide back into the computer case with the drive rails mounted.
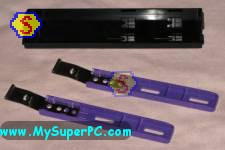 The drive rails are secured to the side of the DVD RW drive using the mounting screws that came in the DVD RW retail box.
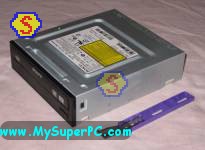 Attach a drive rail to each side of the DVD RW drive. There is more than one hole in the drive rail which can be used to secure the drive rail to the DVD RW drive. Again, it's a matter of trial-and-error to see which hole is best. If the wrong hole is used then the front of the DVD RW drive will not be flush with the other 5.25 inch drive bays when it is mounted inside the computer case. It's important that the drive is properly secured since the next step is to plug in connectors to the back of the drive. The drive needs to be secure since some pressure is required to ensure the power connectors are fully in place.
 Slide the Sony DVD RW drive with the drive rails attached back into the open 5.25 inch drive bay. If the drive rails were attached properly then it should slide right in, clicking into place, and the front of the DVD RW drive should be flush with the rest of the bays.
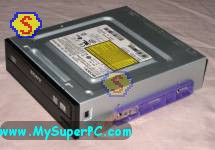 This shows the back of the Sony DVD RW drive inside the computer case with no connections yet made to the back of the drive.
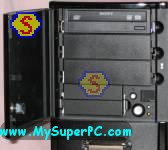 An 80-pin IDE ribbon cable is included in the retail box of the ASUS M2N32-SLI Deluxe Wireless Edition motherboard. It is of the standard length of 18 inches. Although longer 40-pin or 80-pin IDE ribbon cables exist, it's best not to use them unless absolutely necessary. The two connectors that are close together at one end of the IDE ribbon cable are the master and slave connectors. The master connector is on the end of the cable and I've circled it in orange (leftmost in the picture). The connector close to it is the slave connector and I've circled it in red. The connector at the other end of the cable, circled in blue (rightmost in the picture), is for the motherboard. The paper label attached to each connector should be removed.
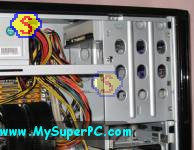 Connect the IDE ribbon cable to the back of the DVD RW. The master connector on the IDE ribbon cable should be used since the DVD RW drive is the first (and only) drive for the IDE ribbon cable. The connection is keyed so it should only be possible to plug it in one way into the IDE ribbon cable socket in the back of the DVD RW drive, but as keys go it's not so great and it's possible to unknowingly plug it in incorrectly, and I should know because I've done it myself. To be really sure it's connected properly, verify the pin 1 marking on the DVD RW drive (circled in yellow) aligns with the stripe marking the pin 1 of the cable (also circled in yellow). The enlarged picture shows both very well.
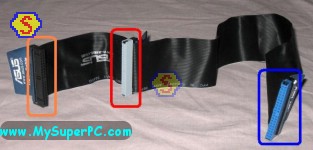 Connect the other end of the IDE ribbon cable, the end with the blue connector, to the motherboard. The cable connects to the IDE socket on the ASUS M2N32-SLI Deluxe Wireless Edition motherboard, shown circled in yellow.
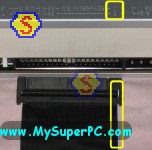 Plug the IDE ribbon cable into the IDE socket on the motherboard. The connector is keyed so it can only be plugged in one way.
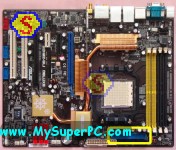 Select one of the 4-pin power connector from the bundle of power connectors coming out of the power supply like the one shown.
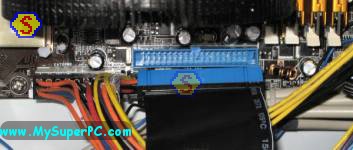 Connect the 4-pin power connector to the back DVD RW drive in the power receptacle. The connection is keyed so it can only plug in one way.
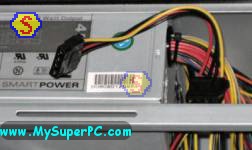 Here is how the back of the Sony DVD RW drive looks inside the computer case with these two connections made to the back of the drive.
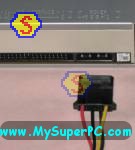 And here's how the inside of the computer looks with the optical drive installed.