Computer Assembly - How To Assemble A PC
Install Windows XP
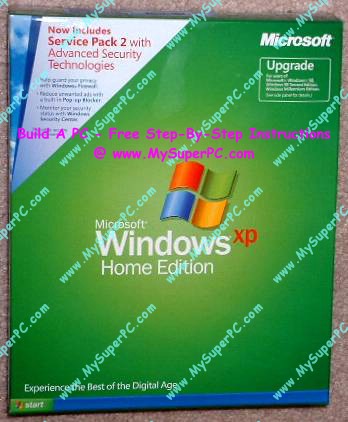
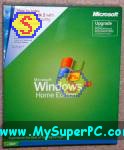
Although Windows Vista has been out for some time, many still prefer Windows XP for the operating system due to its better performance and compatibility. The Windows XP I'm using is Windows XP Home Edition, the upgrade version. The upgrade version requires you have a previous copy of Windows 98 or better that can be used for verification. My retail copy came with Service Pack 2 (and therefore also Service Pack 1) already built-in.
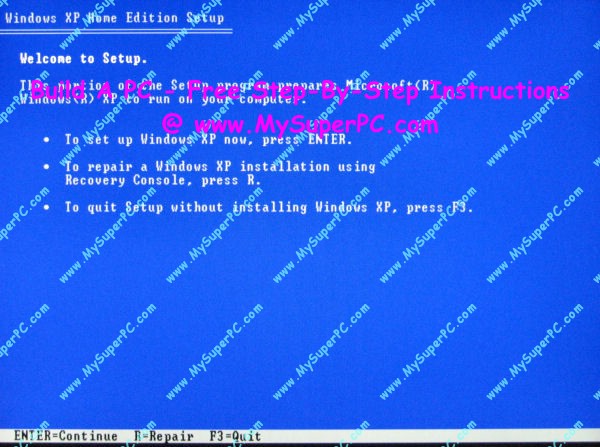
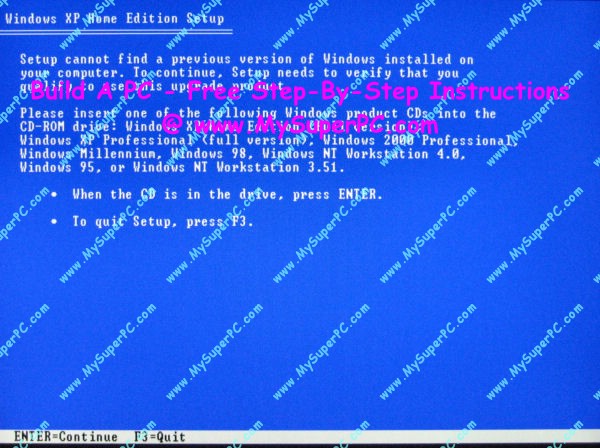
At this point the computer is waiting to be rebooted after having quit the Data Lifeguard Diagnostic utility. The computer is still configured in the BIOS to use the optical drive as the first boot device, so that's good. Insert the Windows XP Home Edition Upgrade CDROM into the optical drive. Push the Reset button on the front of the computer to have it reboot. Let it proceed and it will access and boot from the optical drive (and yes, it will find the Windows CD even if you happen to have two optical drives and the CD is in the optical drive installed on the IDE ribbon cable as the slave drive). You may get a prompt that says "Press any key to boot from CD". A "Windows Setup" screen appears and lasts for about a minute while generic driver installation is performed. After this, here is the first screen you get for the Windows XP Home Edition Upgrade install. When you get to this screen, press the "Enter" key.
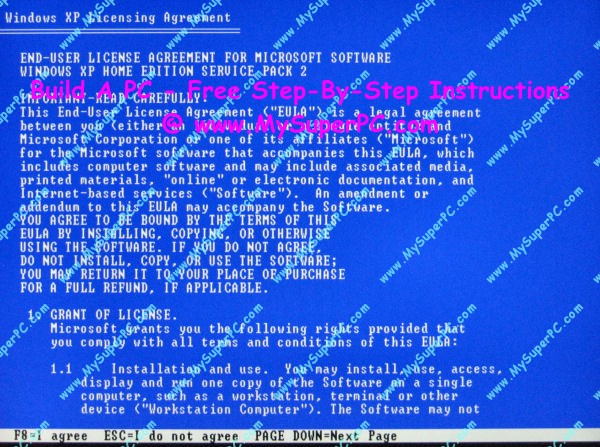
When you're ready, press the "F8" key to accept the Windows Licensing Agreement.
Windows XP now verifies you have a previous copy of Windows 98 or better. Remove the Windows XP CD and insert the CD for your previous copy of Windows into the optical drive. Then press "Enter".
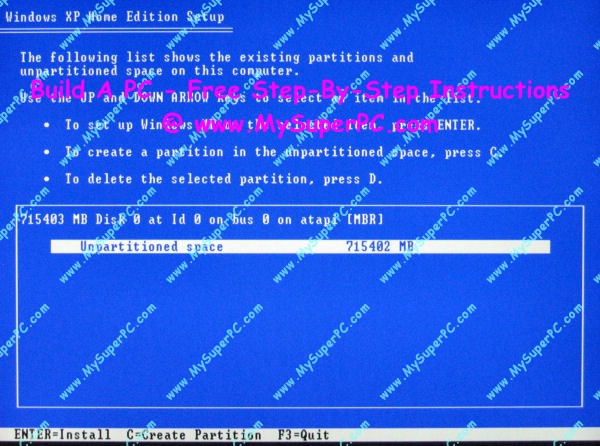
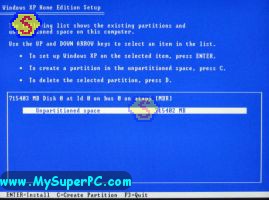
Windows XP will partition and format the hard drive as part of the install. This is very handy and is much easier than dealing with FDISK. Follow the on screen prompts to create the partitions you desire. Whether or not you even want partitions is entirely up to you. Some prefer just one big partition and that will work. Here are the partitions I made for my own hard drive and how I plan to use them.
-
The first partition, C:, is the biggest at 150GB. I like to put all the executables on C: so I made this a large partition. Programs generally expect to be loaded onto C:. Usually they do just fine on another drive, but occasionally I've run into a difficulty. Putting them on C: ensures there will be no problem. I made C: large because I have a number of games and edutainment packages on the PC, and they can take vast amounts of drive space.
-
The next partition is 500GB and is used as a data drive, including holding MP3 music files and videos.
-
The next partition is 40GB and is used to keep a permanent backup copy of any programs or patches I download to install.
-
The last partition is 25B and is used to hold my own development programs. That way if they run amok then they'll only gobble up this much hard drive space before crashing rather than the entire hard drive.
After creating the partitions the way you like, highlight the first entry and press the "Enter" key.
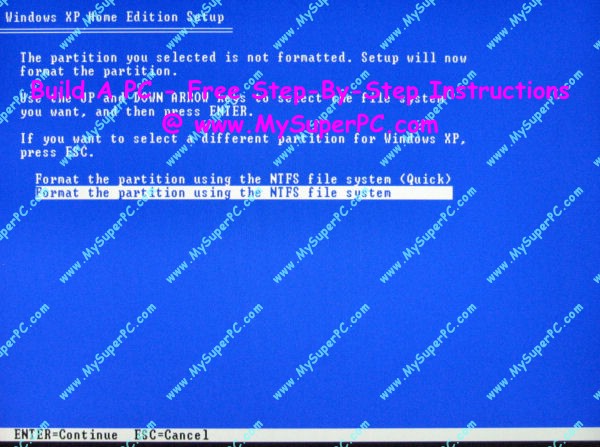
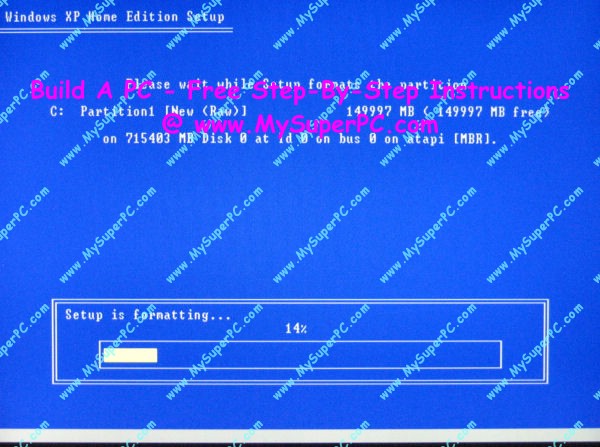
Windows XP will now format the C: partition. It's best to do the thorough format on the drive, not the "Quick" option.
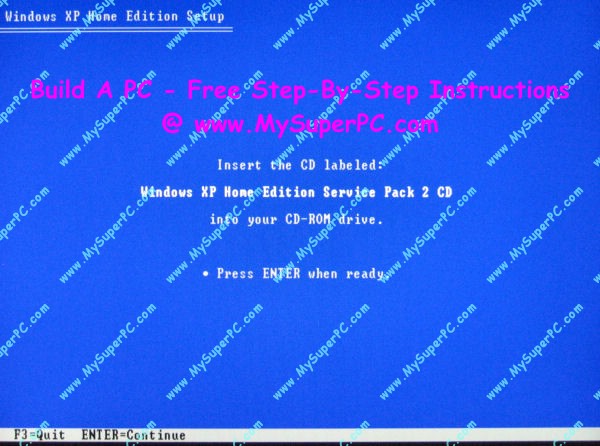
You'll be prompted to return the Windows XP Home Edition Upgrade CD to the optical drive before the formatting begins.
Formatting my SATA Western Digital Caviar SE 750GB hard drive took about 40 minutes.
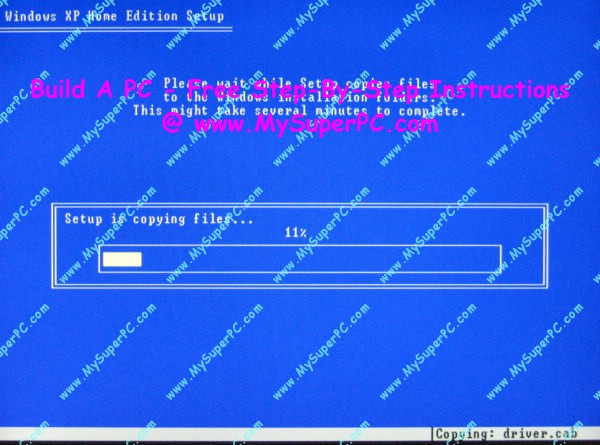
Windows then takes a few minutes to copy files over to the hard drive.
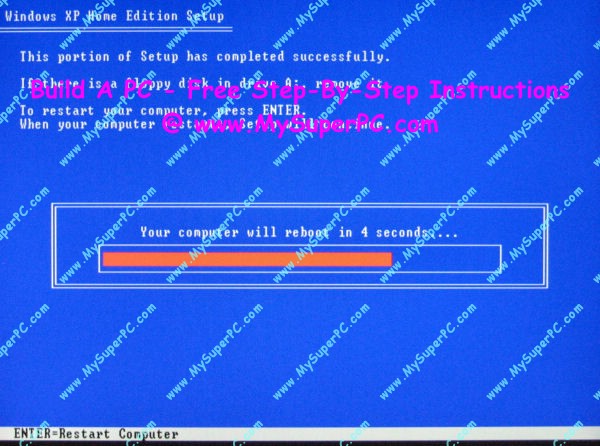
Windows XP Setup then reboots the computer.
After re-booting, Windows XP begins to install on the C: drive.
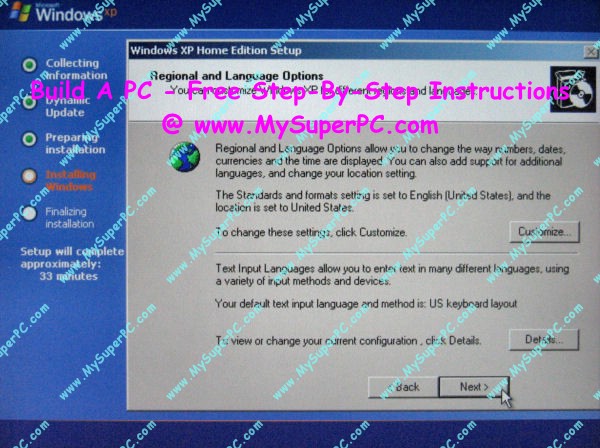
I didn't make any changes at the "Regional and Language Options" page, I just clicked on "Next".
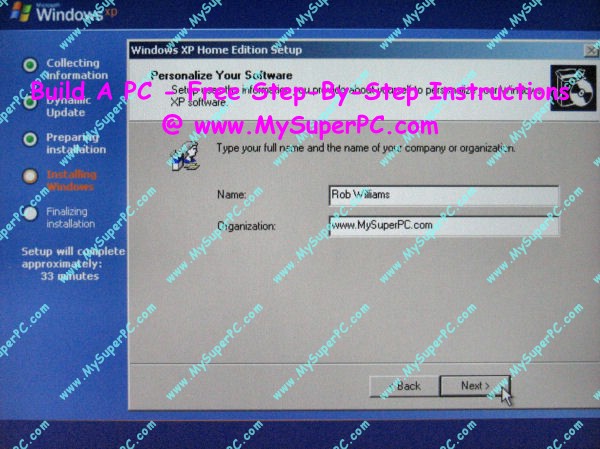
Enter the "Name" and "Organization" for the computer. Then click "Next".
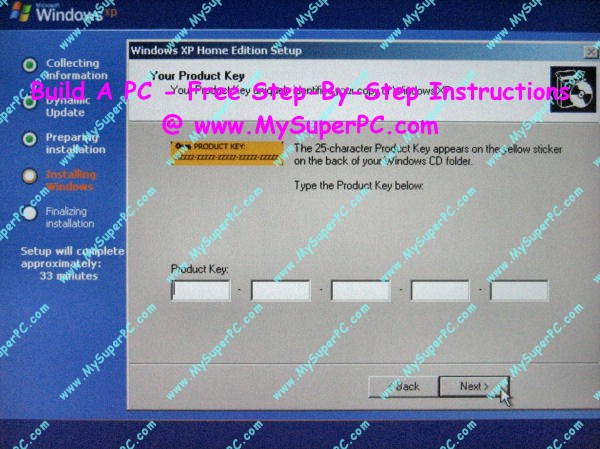
Enter the "Product Key" for your copy of Windows XP which can be found as directed on the screen. Then click "Next".
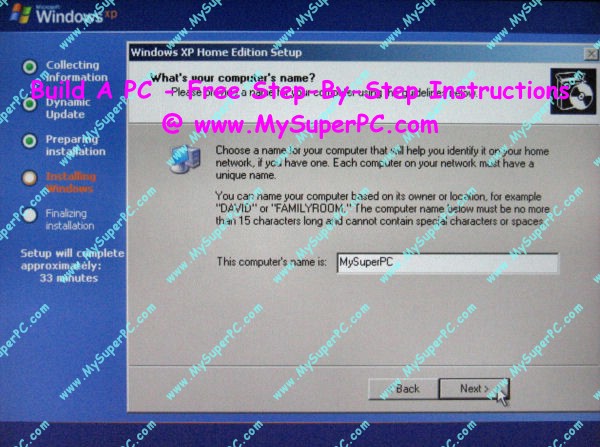
Enter a name for your computer. Then click "Next".
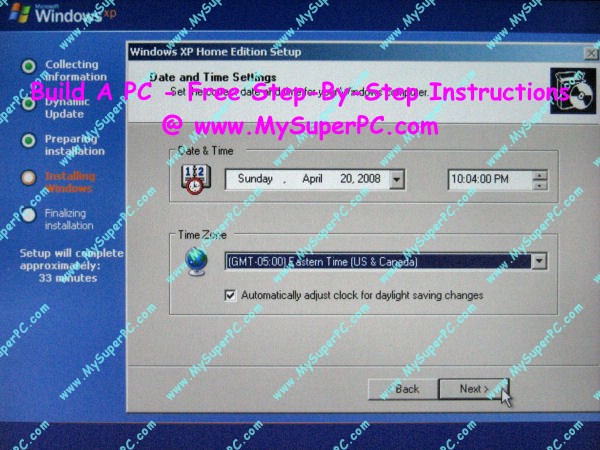
Select your Time Zone. Then click "Next".
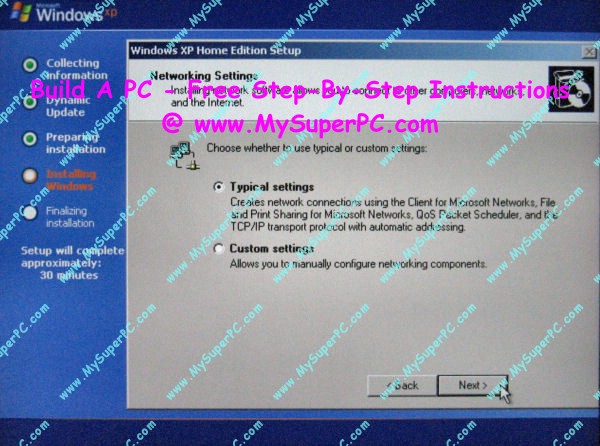
For Network Settings, I used the default of "Typical settings".
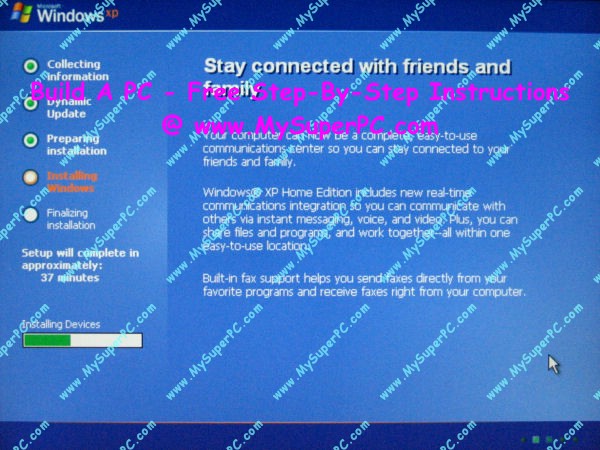
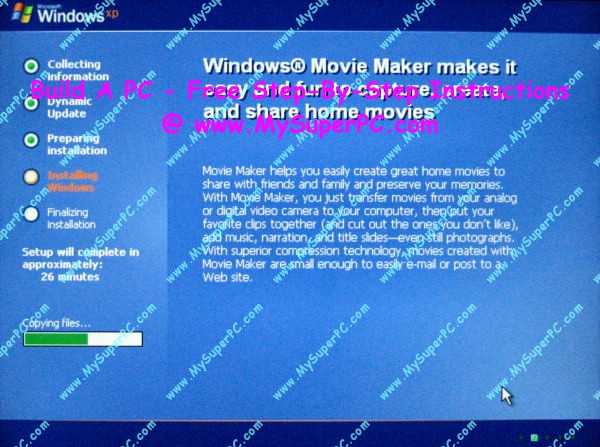
Windows XP is off again to do some more installing for a while.
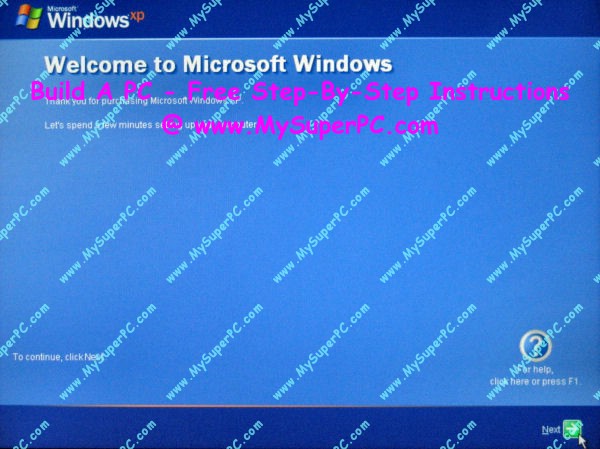
Click the "Next" button when this "Welcome..." window appears.
I chose "Not Right Now" on this window offering to turn on Automatic Updates since the modem isn't even installed yet. Then clicked the "Next" button.
I entered my name as the only user and clicked on the "Next" button.
Click the "Next" button on the "Thank you" window and...
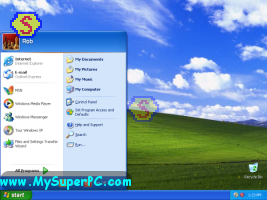
...you're there!! Just before this screen, you might get a notification box indicating that windows has automatically adjusted your screen resolution.
Wow! How cool is this? To have a pristine computer at your fingertips. Here we sit with Windows XP installed on the hard drive and nothing else. Kind of creepy to be looking at so much empty. And a bit scary, too. Up until now we've been dealing with mostly hardware. Windows XP was the first software to be installed.
Any Windows XP Service Packs that have not yet been installed should be installed now. Since the Windows XP version I'm using includes Service Pack 2 (and therefore also Service Pack 1), I have everything at this point. Here is a link to Windows XP Service Pack 2. Another way to get these updates is to let them come in through the Windows XP Automatic Update procedure. This is fine, it just takes longer due to downloads and restarts.
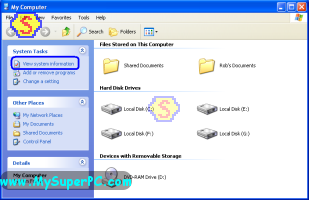
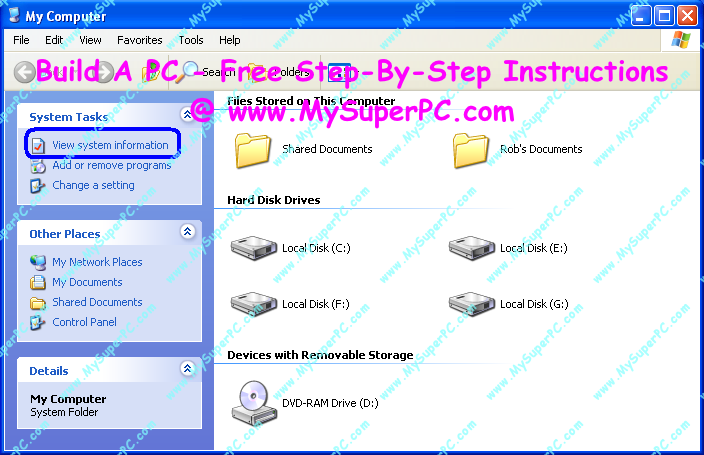
To get a first look at your devices as you'll be seeing them for the most part from here on out, click on Start -> My Computer, which brings up something like this. Notice the "View system information" item in the upper left. That will be used in a moment.
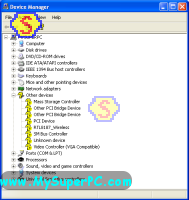
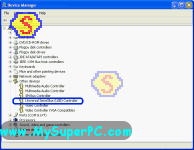
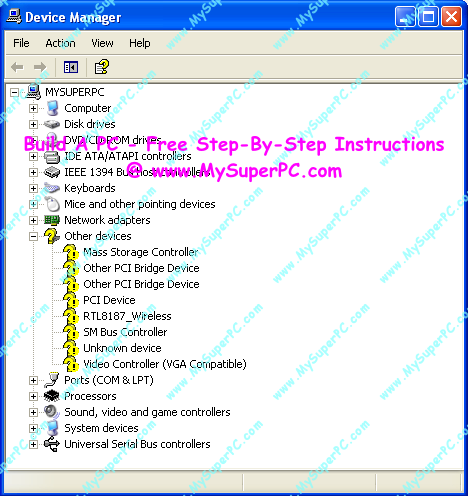
One important thing to do after installing Windows XP or installing any new hardware is to look at the Device Manager to see if there are any problems. Sure enough, I see a number of big yellow question marks and exclamation points in the device list. To see the Device Manager settings from here, click on "View system information", which brings up the System Properties window, then click the Device Manager button on the Hardware tab. Here's what I see.
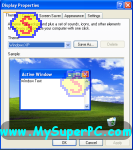
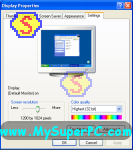
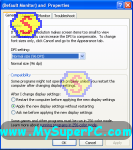
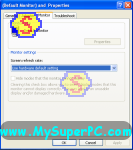
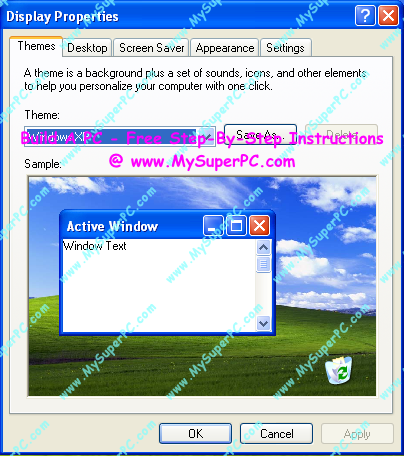
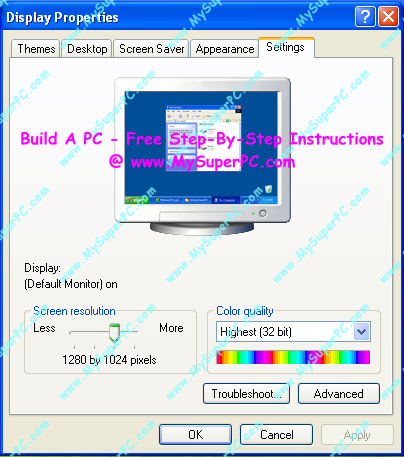
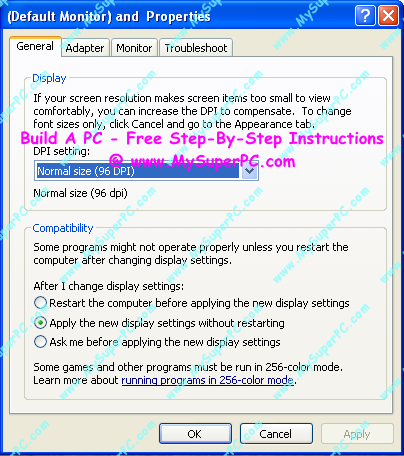
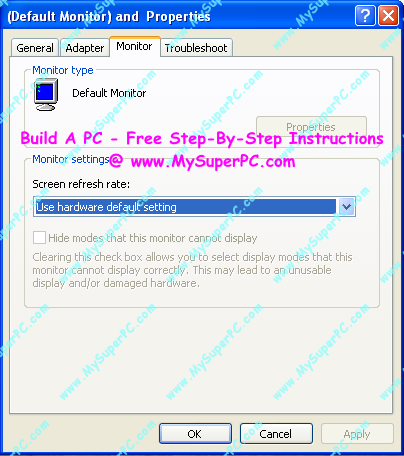
You might notice that the computer seems to be rather sluggish. Moving the mouse, navigating the Windows XP menus, moving windows around, and so forth - just sluggish. And it may be that the windows and text displayed on the screen are not clean and crisp and not the right resolution. Checking the monitor under Display Properties shows it's being recognized as a generic plug-and-play monitor rather than as a Dell 2001FP monitor. To check this, right-click on the desktop and select "Properties" from the pop-up menu. The "Display Properties" window appears as shown in the first picture. On the "Settings" tab, click on the "Advanced" button as shown in the second picture. The "Default Monitor" window (or it may show as "Plug and Play Monitor") appears as shown in the third picture. Click on the "Monitor" tab to see that Monitor Type is set to "Default Monitor" as shown in the fourth picture.
All of these problems will get resolved once the drivers are loaded, such as the drivers for the motherboard, monitor and video card.
Remove the Windows XP Home Edition Upgrade CD from the CD-ROM.
Don't forget to change the BIOS settings for the Boot Device Priority to what you want (I use only the hard drive as a boot device). Shut the computer down. Turn the computer back on, enter the BIOS, and update the boot device settings. Save the BIOS settings and allow the computer to boot to the desktop. Re-booting now, after the install, will also ensure you don't get the RPC Server Is Unavailable error message.
Be aware that all the other hard drive partitions except C: are still "Raw" because they have not yet been formatted. To format a hard drive partition, click Start and then My Computer to see all of your logical hard drives. To format a logical hard drive, right-click on it and then select Format from the pop-up window.
I recommend turning off the Windows screen saver function. Typically the Windows screen saver kicks in after a user defined time period of "inactivity". It's my experience that the screen saver causes problems with other applications. It can be difficult to actually trace the problem to the screen saver since you tend to forget it's even running. In addition, there's no way to predict what it's going to consider "inactivity" and therefore when or even whether it will activate in the middle of whatever else is going on. It has no practical purpose any longer since monitor screen burn in is not a problem with today's monitors. To turn off the screen saver function, right-click on the Desktop, click on Properties in the pop-up menu, select the Screen Saver tab, and for the Screen Saver select "(None)".
Common Problems
Many of the problems I've seen during the actual Windows XP install were due to the BIOS settings. The Windows XP install takes 30 to 45 minutes. During this time the computer is doing an extensive amount of processing and disk input/output. If the Windows XP install completes successfully then you can have some confidence that your BIOS settings are good. Here are the problems I've seen due to improper BIOS settings:
The install hangs-up (the computer freezes).
An error message that says something like "Windows has detected a problem with your computer. This could be caused by bad drivers". That may not be the exact text of the message, but it's the gist of it, anyway.
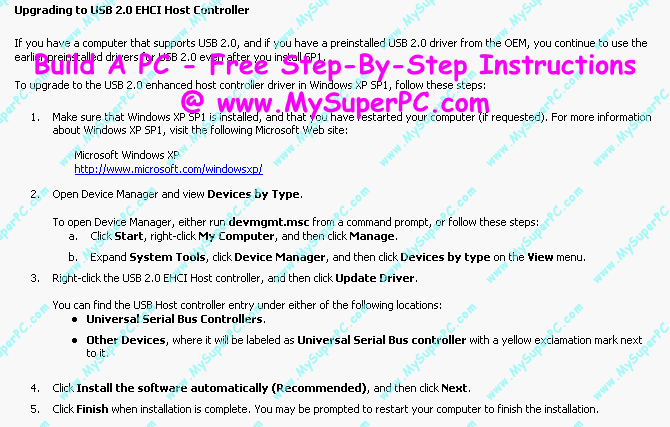
If, after installing Windows XP and all the service packs, you still have a USB device conflict like the one circled in blue below then it can be cleared up by following the steps given by Microsoft Support 329632 Availability of USB 2.0 Support in Windows XP Service Pack 1.
I've also captured the steps here:
My complete recommendations for building a computer with quality components at unbeatable
prices is on my home page at
Build A Computer
Like My Super PC - Cost To Build A Computer. Here again are the recommendations for Windows!
| Description
| Where I Would Get It Today
| Today's Price
| Comments
|
| Windows 10 Home 64-Bit |
Amazon
|
$96.93 |
Free shipping! OEM version, which is fine for building your own computer. Clicking the link takes you directly to it.
|
|
Back to My Super PC - Home Page
How To Build A Computer. Step By Step Instructions To Assemble. Skip To Any Assembly Step.
Back to My Super PC - Home Page
© 2001-2010, Rob Williams, all rights reserved.
|

|
 When you're ready, press the "F8" key to accept the Windows Licensing Agreement.
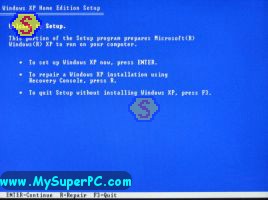 Windows XP now verifies you have a previous copy of Windows 98 or better. Remove the Windows XP CD and insert the CD for your previous copy of Windows into the optical drive. Then press "Enter".
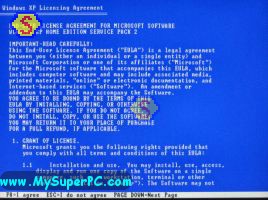 Windows XP will partition and format the hard drive as part of the install. This is very handy and is much easier than dealing with FDISK. Follow the on screen prompts to create the partitions you desire. Whether or not you even want partitions is entirely up to you. Some prefer just one big partition and that will work. Here are the partitions I made for my own hard drive and how I plan to use them.
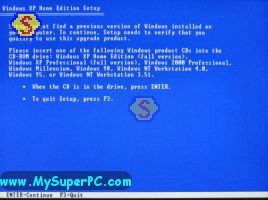
 Windows XP will now format the C: partition. It's best to do the thorough format on the drive, not the "Quick" option.
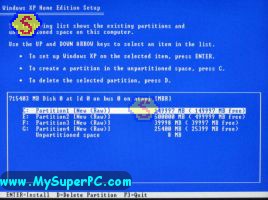 You'll be prompted to return the Windows XP Home Edition Upgrade CD to the optical drive before the formatting begins.
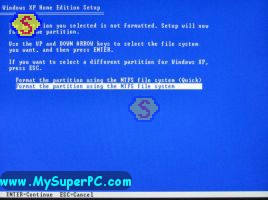 Formatting my SATA Western Digital Caviar SE 750GB hard drive took about 40 minutes.
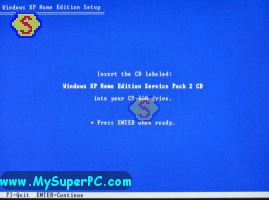 Windows then takes a few minutes to copy files over to the hard drive.
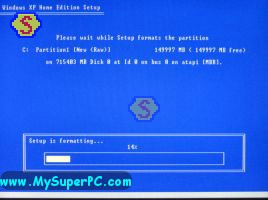 Windows XP Setup then reboots the computer.
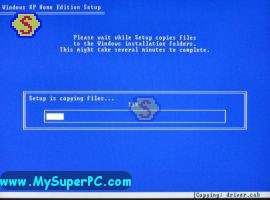 After re-booting, Windows XP begins to install on the C: drive.
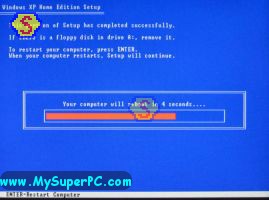 I didn't make any changes at the "Regional and Language Options" page, I just clicked on "Next".
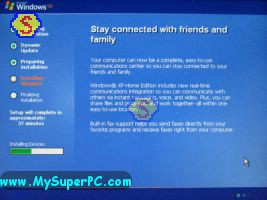 Enter the "Name" and "Organization" for the computer. Then click "Next".
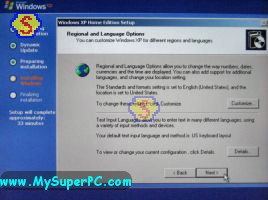 Enter the "Product Key" for your copy of Windows XP which can be found as directed on the screen. Then click "Next".
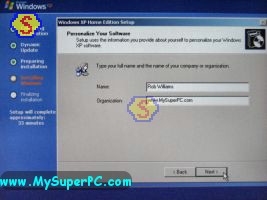 Enter a name for your computer. Then click "Next".
 Select your Time Zone. Then click "Next".
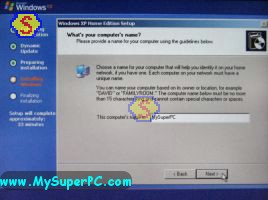 For Network Settings, I used the default of "Typical settings".
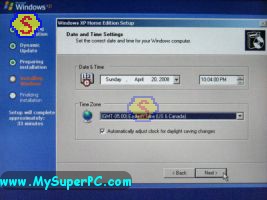 Windows XP is off again to do some more installing for a while.
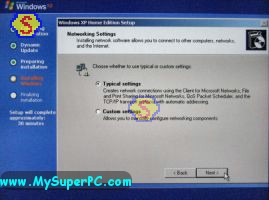 Click the "Next" button when this "Welcome..." window appears.
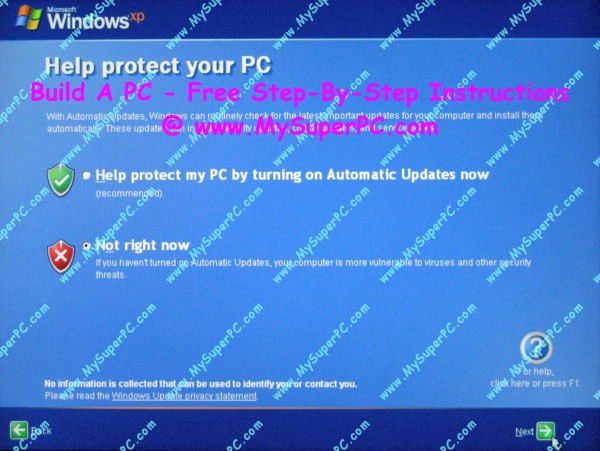
 I chose "Not Right Now" on this window offering to turn on Automatic Updates since the modem isn't even installed yet. Then clicked the "Next" button.
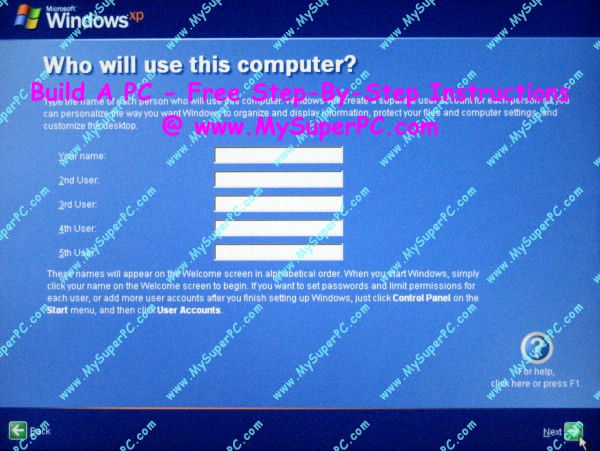
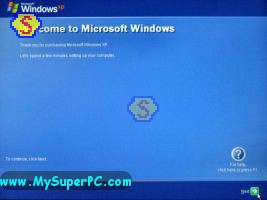 I entered my name as the only user and clicked on the "Next" button.
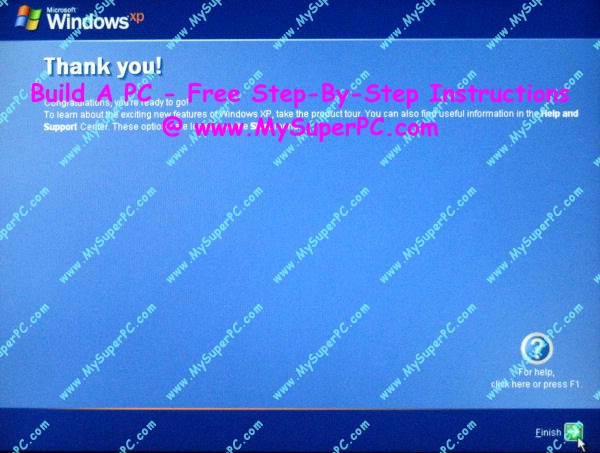
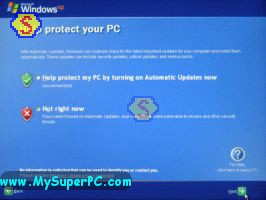 Click the "Next" button on the "Thank you" window and...
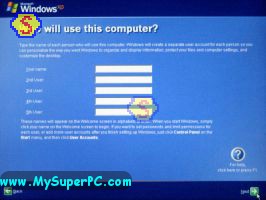 ...you're there!! Just before this screen, you might get a notification box indicating that windows has automatically adjusted your screen resolution.
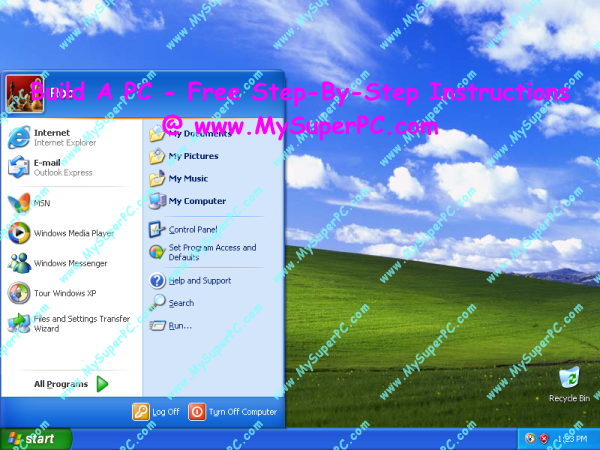
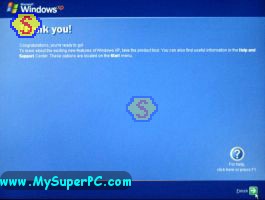 Wow! How cool is this? To have a pristine computer at your fingertips. Here we sit with Windows XP installed on the hard drive and nothing else. Kind of creepy to be looking at so much empty. And a bit scary, too. Up until now we've been dealing with mostly hardware. Windows XP was the first software to be installed.