|
|
|
|
|
|
||
CPU Cooler And Case Fans
CPU Cooler (Heat-Sink And Fan)
There were two reasons I became interested in having a CPU cooler other than the one that game in the retail box of the processor. One is that the the first CPU cooler, also called the heat-sink fan (HSF), that I ever used rattled a good deal of the time. Not all of the time, but much of the time. And not a real loud rattle, but loud enough to be significantly louder than anything else making noise in My Super PC. The other was that the processor was running hot under load. The processor should not exceed 60 degrees Centigrade under load, and ideally should be under 50 degrees Centigrade. If it exceeds 60 degrees Centigrade then additional cooling should be considered.
Although this might seem like it should be a fairly simple component, it turns out that there is much more to it. First, there are lots of CPU cooler options out there, and which one is right for you depends on three things.
- Performance. Meaning how well does it do the job of cooling the processor.
- Cost. Always a factor.
- Noise. How much is acceptable? Some come with fans that are much louder than others, but then they perform better.
Second, you need to know that there are actually three separate parts that make up the CPU cooler.
- The Fan. No surprise.
- The Sink. No surprise.
- The thermal compound (also called thermal paste). Surprised? I was! More on this a little further down.
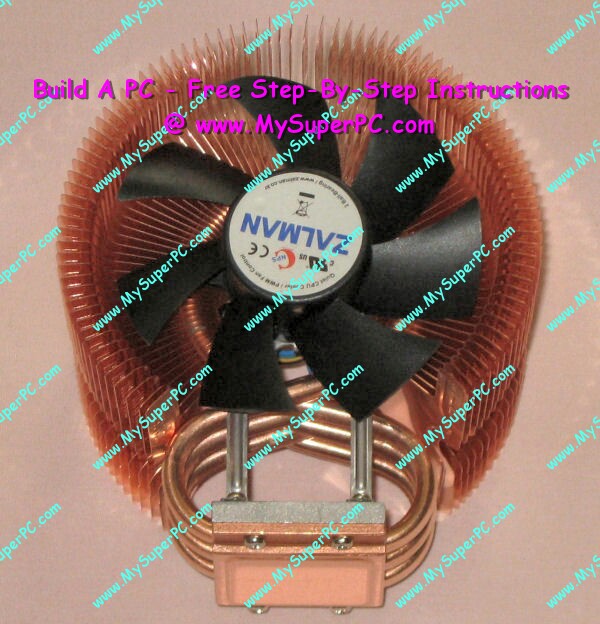
And it gets worse. At the end of it all, the "sweet spot" CPU cooler choice for My Super PC is the Zalman CNPS9500 AT. The Zalman CNPS9500 cools any speed of Intel Core 2 Duo/Quad processor effectively. It is very quiet, virtually silent.

Click on any of the pictures on this page to see the picture enlarged.
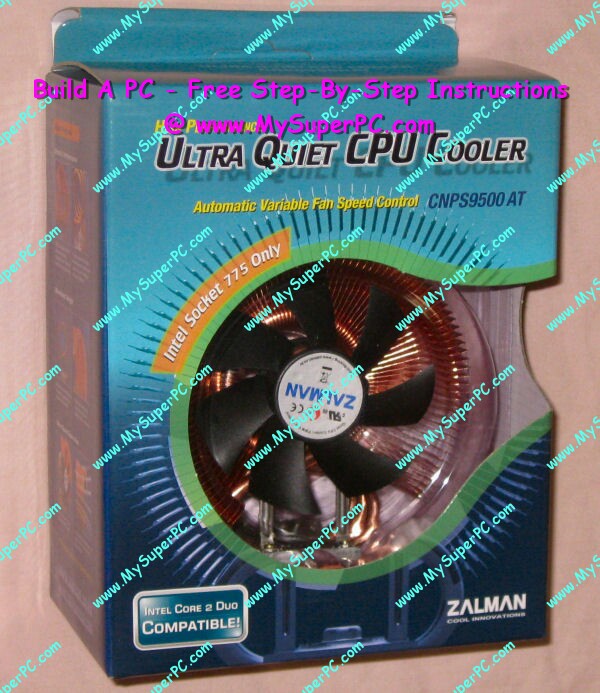
The Zalman CNPS9500 AT that I use for my Intel Core 2 Duo 8400 processor arrived in this packaging.
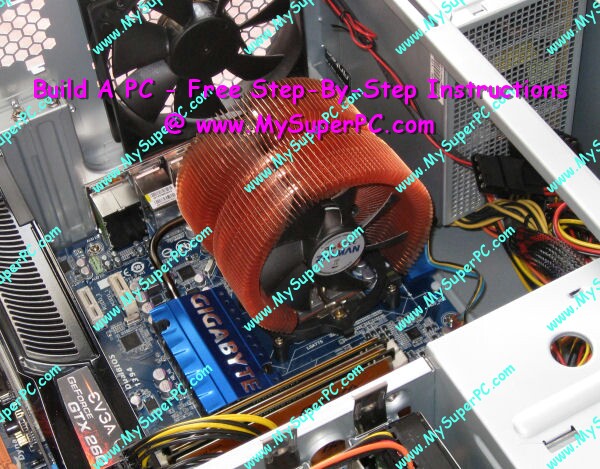
The Zalman CNPS9500 AT is big, but that's good since a big CPU cooler means more cooling with less noise. At least, it's good so long as the CPU cooler does not block installing other components, the RAM in particular. That's one of those "It gets worse" things. Not all CPU coolers are so accommodating. The Zalman CNPS9500 AT CPU cooler does not block any of the four RAM slots on the Gigabyte GA-EP45-UD3P motherboard. In this picture you can see the base of the CPU cooler. Not only is there no thermal compound applied to the base at the factory, but it's extremely smooth and shiny. The retail package also includes an instruction sheet and thermal compound, although I chose to buy Arctic Silver 5 thermal compound separately. Some CPU coolers come with thermal compound already applied from the factory. The thermal compound that comes standard with any CPU cooler is not as good as other alternatives. The thermal compound is important because it transfers the heat efficiently from the processor to the sink. So if the CPU cooler does have thermal compound already applied, it's worthwhile to remove it and apply something better. The "sweet spot" is Arctic Silver 5. I purchased my Arctic Silver 5 from Amazon. A 3.5 gram tube is way plenty for one processor.
Excellent instructions for installing thermal compound can be found by at Artic Silver's home page by looking under the "Support" menu for the "Installation" link which takes you to the Artic Silver application instructions. Before applying new thermal compound, the old factory thermal compound must be removed if the CPU cooler came with it already applied. Although I did not need to clean off factory thermal compound from the Zalman CNPS9500 AT, I've done it several times before with other CPU coolers. It comes off almost without a trace following the instructions given by Arctic Silver, which include using isoproply alcohol, a clean credit card, lint free cloths, a clean toothbrush and elbow grease.
Installation of the CPU cooler on an Intel processor is fairly easy following the instructions that come with the CPU cooler.
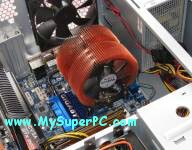
Here the Zalman CNPS9500 AT sits triumphantly installed in My Super PC on my Intel Core 2 Duo 8400 processor!
Case Fans
In addition to the CPU cooler, the computer should have a case fan used for exhaust. The Antec Sonata comes with a 120mm case fan. This larger size - many computer cases are configured for case fans that are 80mm in size or even smaller - make it quieter and allow it to move more air, thus providing better cooling. I would not be concerned if the computer case did not come with a case fan since it lets me pick my own quality, quiet fan. The case fan supplements the exhaust provided by the small fan that comes built into any power supply. One case fan is sufficient.
An exhaust case fan is much more important than an intake case fan. It's very important and even necessary to have an exhaust fan, but an intake fan is not really needed at all. The action of the exhaust fan will pull in air as intake anyway. If intake is provided, it should not exceed the airflow generated by the exhaust.
Any computer should get some exhaust from the power supply exhaust fan. Usually the power supply exhaust fan is not a very powerful fan, not even as powerful as a weak computer case fan. But the cooling it provides is effective nevertheless. From my experience, the additional cooling provided by one more decent exhaust case fan is plenty. In fact, additional case fans beyond this configuration as exhaust or intake give very little extra cooling and are not worth the cost, trouble, or noise. If the power supply has only one fan built into it, which would be an exhaust fan, then it probably will not have a 3-pin connector for the fan. But many power supplies have two fans built right into the power supply, one for intake and one for exhaust. The connection must be made for the exhaust fan to work.
Case fans come with either a 3-pin connector that plugs directly into the motherboard, or a 4-pin connector that plugs into a connector coming from the power supply. Either type of connector is fine and I would not prefer one over the other. It's not a good idea to plug a 4-pin case fan into the motherboard using a 4-pin to 3-pin converter. The reason is because a 4-pin case fan is probably a 4-pin case fan in the first place because it needs the extra power that it can draw by being plugged directly into the power supply. On the other hand, it's always ok to plug a 3-pin case fan directly into a 4-pin power supply connector by using a 3-pin to 4-pin converter. Some 3-pin case fans need more power than the 3-pin connectors that some motherboards provide. This is not an issue with quieter, lower rpm case fans and modern motherboards. But with noisier, higher rpm 3-pin case fans and older motherboards, it's something to look at.
If you use the 4-pin connectors from the power supply to connect the computer case fans then there's not much to worry about. It's even ok to use a Y-splitter so a 4-pin connector is not dedicated to a computer case fan. It's not likely that a 4-pin case fan connector will cramp the number of available power connectors coming from the power supply since modern power supplies come with plenty of connectors of all types. It's even not unusual to see a power supply with power connectors tagged as "fan only".
As for brands, I've used Sunon case fans in the past, but I would not be too particular about the brand. Just keep an eye on it's airflow rating, decibel rating, and ensure it's the right size for the case. It should not be difficult to find case fans with a decibel rating under 30dB, which equates to a soft whisper", as a reasonable top-end for acceptable noise level. Case fans are muffled somewhat just by being enclosed in the case, and the noise level of a case fan used for exhaust is further reduced by backing far away since it is located in the back of the PC.
Results
As you'll see below, an exhaust case fan makes quite a difference. I took temperature measurements with and without the case fan to see the effect. The CD that comes with your motherboard may include a utility for displaying the temperature readings of the CPU and System. I used EasyTune5 Pro which was included on the CD that came with the Gigabyte GA-EP45-UD3P motherboard.
Temperature settings should be checked when the CPU is under load. A widely used "torture test" for the CPU is Prime95. Temperatures definitely rise once this program gets cranking! It takes about 50 minutes for My Super PC temperatures to stabilize and that's when I take the temperature reading. Just a quick note about Prime95 - its primary use has something to do with finding prime numbers, which may be interesting in its own right. However, you can skip all that. Once you download and install Prime95, go to the options pull-down window and there will be an option for "Torture Test". Here are the results I achieved. All temperature readings are in Centigrade. All fan speed readings are in rpm (revolutions per minute). MB is for "motherboard", or the system temperature.
CPU
TempMB
TempCPU
FanCooling Components Comments 40 45 2191 The 120mm exhaust case fan is not connected. But there is a small fan on the power supply providing a little exhaust. These temperatures are quite low. In fact, it's rather amazing how low the temperatures are under load with so little fan cooling being applied. 34 39 2070 The 120mm exhaust case fan of the Antec Sonata III computer is connected and set to "Low" speed. The exhaust fan makes quite a bit of difference all around, even at the low speed setting. Not only is the system temperature significantly lower, the CPU temperature is much lower and the CPU fan is spinning more slowly and thus more quietly. The noise level of the computer is virtually silent. With temperatures this low under load, there's no reason to consider setting the 120mm exhause case fan to a higher speed setting. Leaving it at the low setting keeps the noise down.
An overview of the maximum processor/CPU temperatures can be found at the Heatsink Guide.
My complete recommendations for building a computer with quality components at unbeatable prices is on my home page at Build A Computer Like My Super PC - Cost To Build A Computer. Here again are the recommendations for a CPU cooler!
|