Hard Drive Upgrade Install Guide
What You Need For A Hard Drive Upgrade (continued)
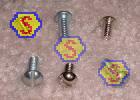
Mounting screws for the new hard drive. It's not a good idea to try and re-use (or share) the screws from the old hard drive since the strategy involves having both the old hard drive and new hard drive installed at the same time. And it's not a good idea to try and let one of the hard drives just sit around loose on something since bolting the hard drive into the case provides vibration control essential for the proper operation of the hard drive. For the new hard drive I selected, there are places for 6 screws, three on each side. On the IBM Deskstar 120GXP 80GB hard drive (and this was also true for my old IBM Deskstar 75GXP drive), some screws could be longer than others. In fact, three of the six screws could be longer since they had more clearance to the hard drive itself. For my hard drive upgrade and install, I used a total of six round-head machine screws, size 6-32. Three of the screws were 1/4 inch in length and three of the screws were 3/8 inch in length. It's also fine to use all six screws at the 1/4 inch length. I puchased the screws from Radio Shack (search on the catalog number 64-3012). Of course, need I say it, a flathead screwdriver is needed as well. Click on the picture to see it enlarged.
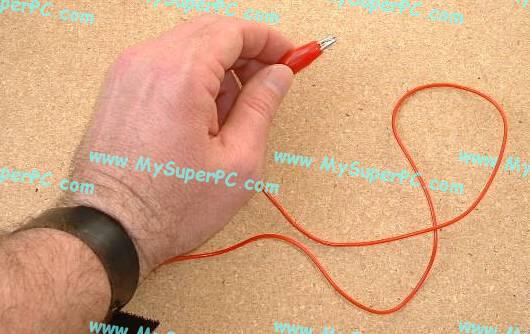
An antistatic wrist strap. An antistatic wrist strap should be worn any time work is being done inside the computer. The alligator clip should be attached to a nonpainted metal surface on the computer case. The antistatic wrist strap prevents static electricity from building up. Static electricity can electronically destroy many of the delicate components inside the computer. As an extra precaution, it's a good idea not to shuffle around while working inside the computer case. If you need to change position then let go of any electronic component, change your position, get comfortable again, then touch the nonpainted metal surface of the computer case with your hand before touching anything else. Touching the nonpainted metal surface of the computer case with your hand is another way to harmlessly release any static buildup. But this is an extra precautionary step - you should still always wear the antistatic wrist strap while working inside the case for any reason.
Good anti-static wrist straps are not expensive,
such as this Belkin anti-static wrist strap from Amazon.
A hard drive fitness test utility. A utility called Drive Fitness Test (DFT) is available for IBM/Hitachi hard drives as a free download from the IBM/Hitachi Storage Technical Support Download page (IBM and Hitachi have merged their Storage Divisions). It's used to certify the integrity of IBM hard drives. Although it's not absolutely necessary to use a hard drive fitness test utility as part of the hard drive upgrade, it's certainly a good idea. After all, we're talking about the integrity of the data on the computer! The ideal time to use it is now, prior to use of the new hard drive, when the full battery of tests can be run, including the ones that write data. However even the read-only tests are worthwhile. Download the appropriate hard drive fitness test for the brarnd of hard drive. For IBM/Hitachi hard drives, the Users Guide for the Drive Fitness Test is also available from the downloads page. It includes instructions on how to create a Drive Fitness Test floppy disk.
There are additional utilities available on the IBM/Hitachi Storage Technical Support Download page. One which may be of particular interest to those with older computer systems is the Feature Tool utility. Among other things, it can be used to change the predefined capacity of the hard drive. Older computers may have a BIOS limitation that prevents the hard drive from being recognized at full capacity.
Here are links to hard drive utilities from other commonly used manufacturers.
| Manufacturer | Utility | Comments
|
| Western Digital |
Data Lifeguard |
Data Lifeguard is a suite of utilities that includes DLG Diagnostic which performs similar functions to the IBM/Hitachi Drive Fitness Test.
|
| Maxtor |
Powermax |
The version available at this writing, version 4.06 dated June 2, 2003, states it does not work in computers that use NVIDIA chipset motherboards, meaning it doesn't work with the nForce2 chipset used on the EPoX 8RDA+ and other popular motherboards. Sheesh. They say they're working on a updated version that will support NVIDIA chipsets. Gee, good idea. |
|
| Seagate |
DiscWizard Program Suite |
The version named DiscWizard Starter Edition is the right one for building a new computer. The page also includes other helpful downloads, such as the specifications and jumper settings for all Seagate drives. |
|
Uninstall GoBack. I have Roxio's Goback 3 Deluxe installed on all of my computers. The hard drive upgrade procedure I used and describe here will not work with GoBack installed. The problem is the Norton Ghost Boot Disk will detect that GoBack is on the hard drive and will refuse to do the clone. The Symantec Knowledge Database includes an entry for
Error: GoBack Partition Detected. Specifically, the error message states "You are attempting to clone a drive with a GoBack partition without the GoBack drivers loaded. You can either do a sector by sector copy or abort the operation. We suggest you abort and reboot loading the GoBack drivers". Notice I did not just disable GoBack, I uninstalled it. The GoBack history of disk changes is lost anyway whenever GoBack is disabled, and I know GoBack is inserting itself at a very low level in the disk input/output operations, so may as well uninstall it and be sure it's out of the way. Turns out that was the right thing to do as the Symantec Knowledge Database entry Ghost compatibility with GoBack reaches the same conclusion.
Run "DiskScan" and "Disk Defragmenter" on the old hard drive to ensure all is well with it before it is cloned. To run DiskScan, click on Start, then Programs, then Accessories, then System Tools and then finally DiskScan. After running DiskScan, next run Disk Defragmenter which is also located under the System Tools menu.
Make a backup of the old hard drive. This is just to be safe and it should be something that's being done on a routine basis anyway, so now's a good time to get a current backup. It's highly unlikely that anything will go wrong, but if it does then don't say I didn't warn you. There are different types of backups. Obviously the type of backup called for in this case is the kind where the backup media is different than the old hard drive.
Skip Ahead
© 2001-2015, Rob Williams, all rights reserved.
|

|