Computer Assembly - How To Assemble A PC
Install The Hard Drive And Floppy Drive
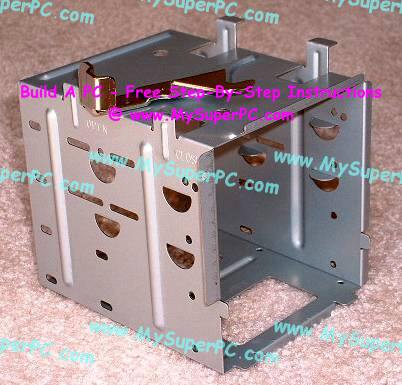
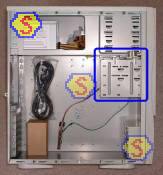
The Antec KS282 comes with a drive cage that makes floppy drive and hard drive installation a little easier. The idea is that the drive cage can be removed from the computer case, the drives mounted inside the drive cage, and then the drive cage put back inside the computer case. This makes it a little easier to get to both sides of the drive while inserting the mounting screws. Here is the location of the drive cage.
Moving the chrome lever on the drive cage to the left releases the drive cage and it comes right out. You might want to practice with the drive cage empty until you feel comfortable releasing it and replacing it back into the computer case. The lever can be a bit stiff. And you might find it a little difficult to put the drive cage back in as easily as it came out. You have to be careful to use the notches on both sides of the drive cage. It's easy to miss the notches on the other side of the drive cage and if you do then you'll find after locking it that the other side is not latched into anything so it's kind of hanging down.
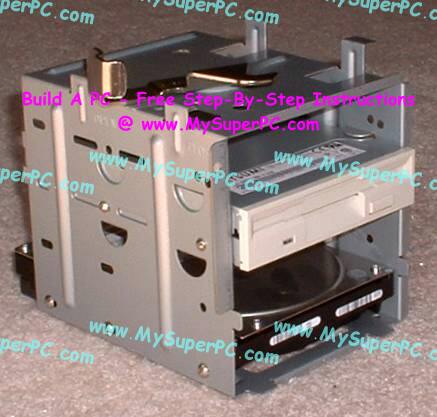
Remove the drive cage and install the floppy drive and hard drive into the cage using the corresponding mounting screws The floppy drive has to be installed in the second position from the top so that it lines up with the spot on the outside of the case where the floppy disk can be inserted into the drive. The hard drive can go into any of the other three slots, but I put it in the bottom slot to maximize airflow. The bottom of the drive cage is largely open, so that helps with airflow, too.
Exactly how the hard drive is oriented front-to-back in the drive cage doesn't matter to much. But for the floppy drive it does matter. The reason is because the floppy drive will be externally accessed, so the floppy drive needs to be situated such that a floppy disk can be easily inserted. Even more important, the floppy drive has to be situated at an appropriate distance from the floppy disk release button on the outside of the case so that when pushed it will push against the floppy drive release button on the floppy drive itself. Once you have the floppy drive oriented front-to-back inside the drive cage so that the release button works then there should be no problem inserting and retrieving a floppy disk from outside the computer. The only way to know exactly where to tighten in the floppy drive is trial and error. If the floppy drive is oriented too far away from the release button on the computer case then when pushed it will be totally loose and obviously doing nothing. If the floppy drive is oriented too close to the release button on the computer case then when pushed it will not move and appear stuck. But if the floppy drive is oriented such that the release button works and will pop out the floppy disk then that's good enough. Here is the drive cage locked back into the computer.
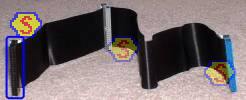
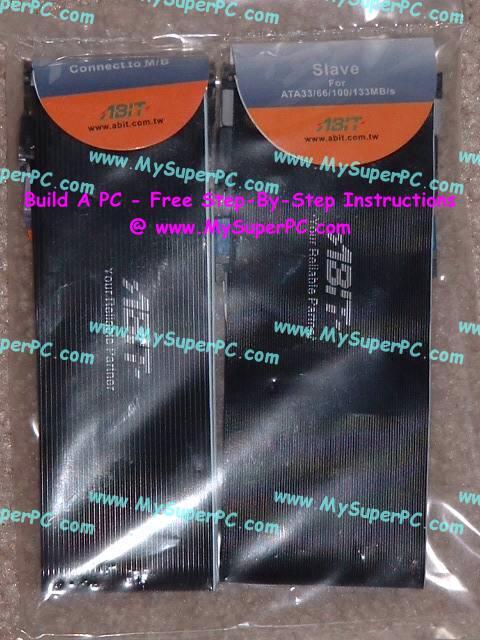
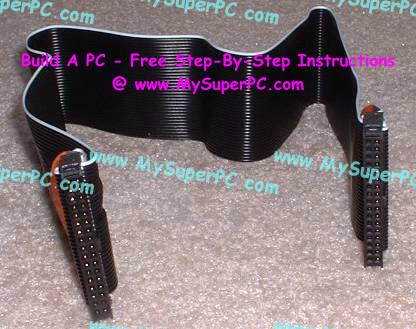
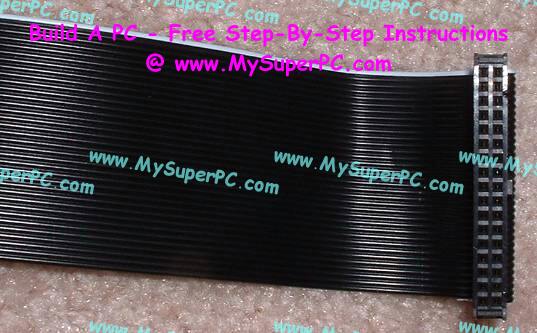
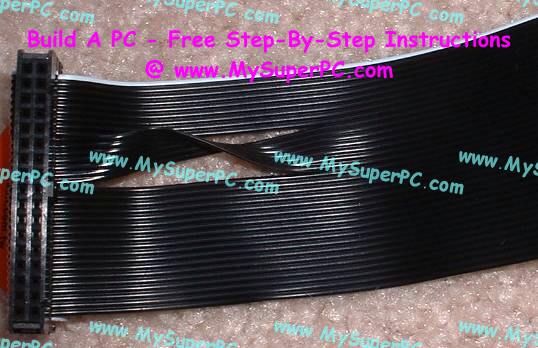
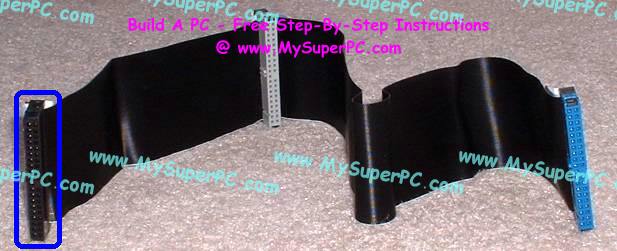
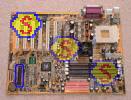
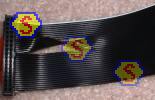
The floppy drive and hard drive use separate ribbon cables. The ribbon cables are included with the ABIT KR7A-133 motherboard in the package shown below. The ribbon cable for the floppy drive is coarser than the ribbon cable for the hard drive. The floppy drive ribbon cable only has two connectors, one at each end and both are black, whereas the hard drive ribbon cable has three, one at each end and one in between using colors blue, gray and black. The ribbon cables that come with the ABIT KR7A-133 are plainly labeled at each connector. For example, the floppy drive ribbon cable states "Disk A for 1.44M 3.5 inch Floppy Disk" on one connector and "Connect to M/B", where M/B is short for motherboard, on the other connector. These paper labels that are attached to each connector should be removed prior to turning on the computer.
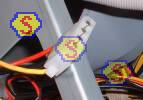
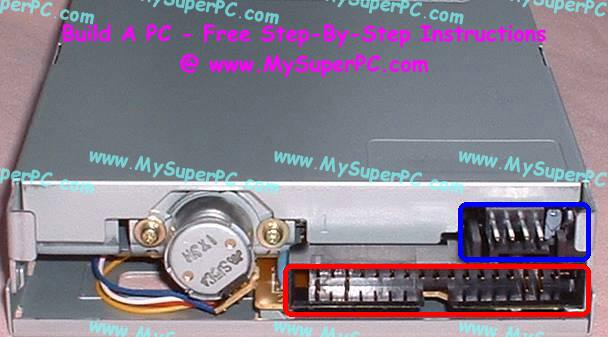
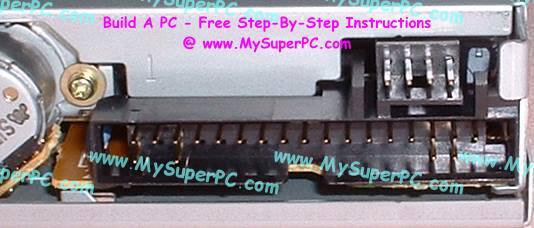
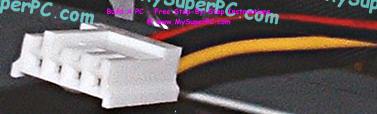
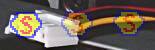
Two connections need to be made to the rear of the floppy drive. The top one circled in blue is for the power connector. The bottom one circled in red is for the ribbon cable.
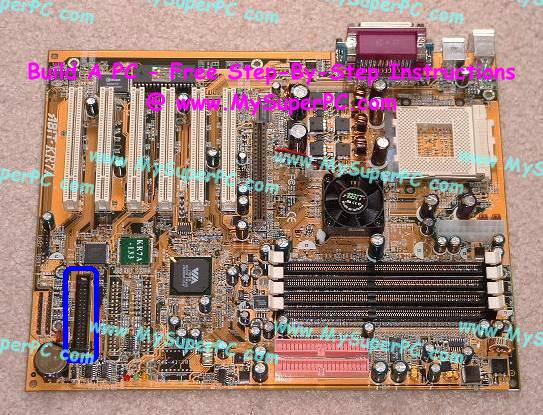
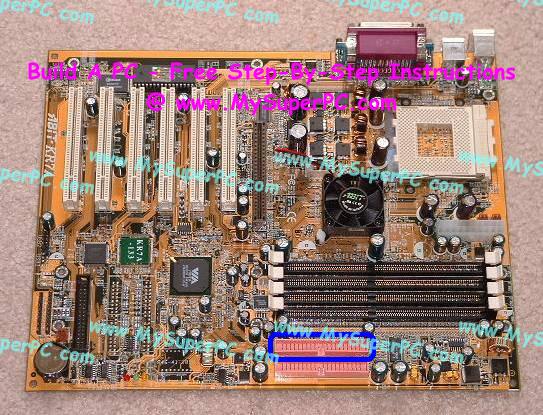
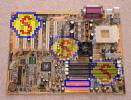
Using the floppy drive ribbon cable, connect the floppy drive to the motherboard. The two ends of the floppy drive ribbon cable are both black, so color coding is not used to distinguish which end goes on the motherboard and which ends goes to the floppy drive. The end that goes on the motherboard is the end without the split-and-twist in the cable near the connector, which is the end with the ABIT supplied paper label that reads "Connect to M/B". The ribbon cable connects to the ABIT KR7A-133 motherboard as shown in the blue circle. The connector is keyed so it can only be plugged in one way.
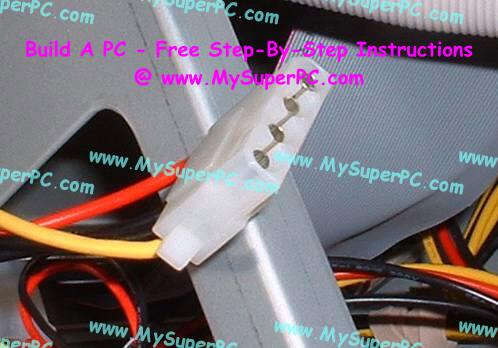
The other end of the floppy drive ribbon cable has a split-and-twist in the cable near the connector. This is the connector that plugs into the cable socket in the back of the floppy drive. Select a floppy drive power connector from the bundle of power connectors coming out of the power supply like the one shown and connect it to the rear of the floppy drive in the power receptacle. Both connectors are keyed so they can only plug in one way.
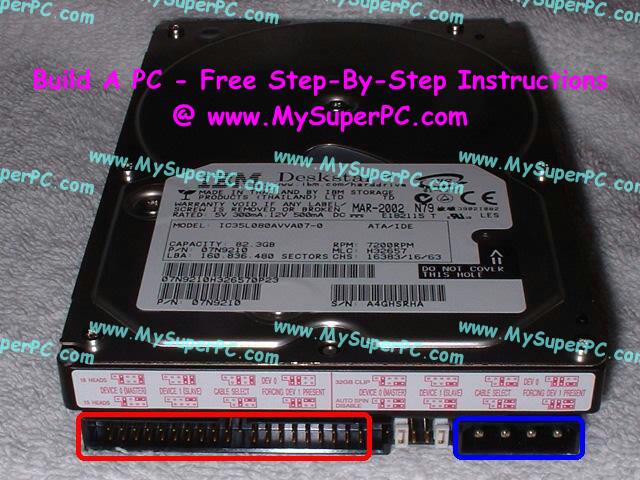
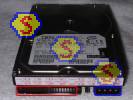
This picture shows the rear of the hard drive where the connectors plug in. There are three sections on the rear of the hard drive. The leftmost section circled in red is the IDE socket where the IDE cable connects. The jumper pins are in the middle. They are set in the "16 Heads, Device 0 (Master)" position out of the box, which is what's needed for the configuration of this computer. The rightmost section circled in blue is the power receptacle for the power connector. If you'd like to know more about the jumper pins then check out my own site at Hard Drive Upgrade - Jumper Pins.
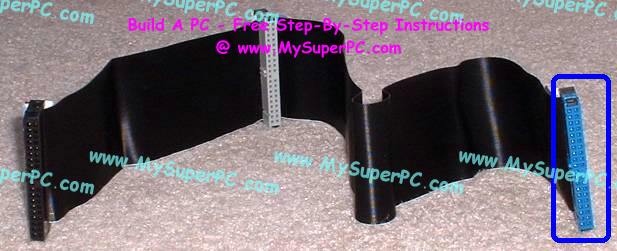
Using the ATA133 ribbon cable that came with the ABIT KR7A-133 motherboard, connect the hard drive to the motherboard. The blue connector on the IDE cable plugs into the IDE 1 socket on the motherboard. The connector is keyed so it can only be plugged in one way.
The black connector on the ATA133 ribbon cable plugs into the IDE socket on the hard drive. The connector is keyed so it can only be plugged in one way. Select a 4-pin power connector from the bundle of power connectors coming out of the power supply like the one shown and connect it to the rear of the hard drive in the power receptacle. This connector is also keyed so it can only plug in one way.
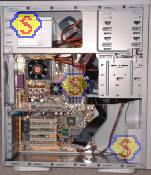
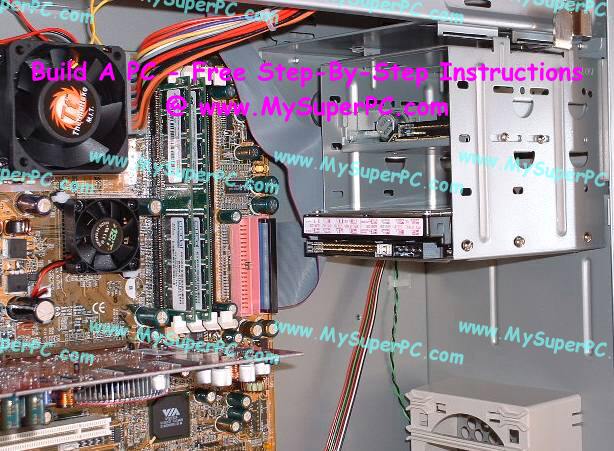
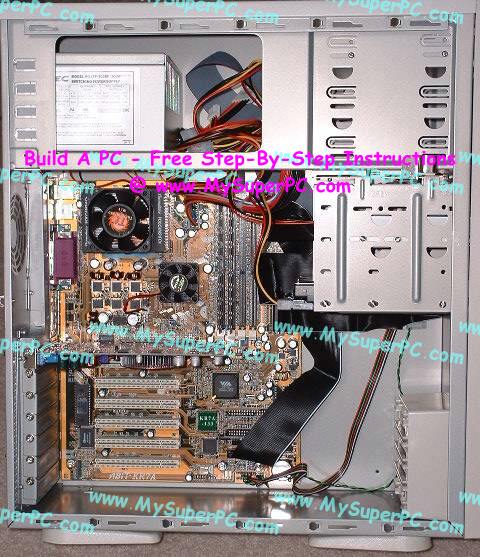
Here's how the computer looks now with the CD-ROM, floppy drive and hard drive added. Of course, you really can't see a whole lot of them since they are inside their bays. Even so it's starting to look a bit cluttered inside, isn't it? Notice I've tried as much as possible to move the ribbon cables and power cords out of the air flow.
My complete recommendations for building a computer with quality components at unbeatable
prices is on my home page at
Build A Computer
Like My Super PC - Cost To Build A Computer. Here again are the recommendations for a hard drive!
| Description
| Where I Would Get It Today
| Today's Price
| Comments
|
| Western Digital Caviar SE 160GB 7200rpm Parallel ATA100 |
Amazon
|
$69.99 |
Free shipping! OEM version. Standard IDE/PATA (parallel ATA) hard drive.
Clicking the link takes you directly to it.
|
| Western Digital Caviar SE 320GB 7200rpm Parallel ATA100 |
Amazon
|
$89.99 |
Free shipping! OEM version. Standard IDE/PATA (parallel ATA) hard drive.
Clicking the link takes you directly to it.
|
|
Back to My Super PC - Home Page
Skip Ahead
Back to My Super PC - Home Page
© 2001-2011, Rob Williams, all rights reserved.
|

|
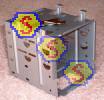
 The floppy drive and hard drive use separate ribbon cables. The ribbon cables are included with the ABIT KR7A-133 motherboard in the package shown below. The ribbon cable for the floppy drive is coarser than the ribbon cable for the hard drive. The floppy drive ribbon cable only has two connectors, one at each end and both are black, whereas the hard drive ribbon cable has three, one at each end and one in between using colors blue, gray and black. The ribbon cables that come with the ABIT KR7A-133 are plainly labeled at each connector. For example, the floppy drive ribbon cable states "Disk A for 1.44M 3.5 inch Floppy Disk" on one connector and "Connect to M/B", where M/B is short for motherboard, on the other connector. These paper labels that are attached to each connector should be removed prior to turning on the computer.
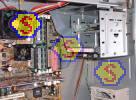 Two connections need to be made to the rear of the floppy drive. The top one circled in blue is for the power connector. The bottom one circled in red is for the ribbon cable.
 Using the floppy drive ribbon cable, connect the floppy drive to the motherboard. The two ends of the floppy drive ribbon cable are both black, so color coding is not used to distinguish which end goes on the motherboard and which ends goes to the floppy drive. The end that goes on the motherboard is the end without the split-and-twist in the cable near the connector, which is the end with the ABIT supplied paper label that reads "Connect to M/B". The ribbon cable connects to the ABIT KR7A-133 motherboard as shown in the blue circle. The connector is keyed so it can only be plugged in one way.
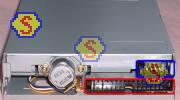 The other end of the floppy drive ribbon cable has a split-and-twist in the cable near the connector. This is the connector that plugs into the cable socket in the back of the floppy drive. Select a floppy drive power connector from the bundle of power connectors coming out of the power supply like the one shown and connect it to the rear of the floppy drive in the power receptacle. Both connectors are keyed so they can only plug in one way.
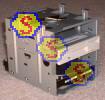
 This picture shows the rear of the hard drive where the connectors plug in. There are three sections on the rear of the hard drive. The leftmost section circled in red is the IDE socket where the IDE cable connects. The jumper pins are in the middle. They are set in the "16 Heads, Device 0 (Master)" position out of the box, which is what's needed for the configuration of this computer. The rightmost section circled in blue is the power receptacle for the power connector. If you'd like to know more about the jumper pins then check out my own site at Hard Drive Upgrade - Jumper Pins.
 The black connector on the ATA133 ribbon cable plugs into the IDE socket on the hard drive. The connector is keyed so it can only be plugged in one way. Select a 4-pin power connector from the bundle of power connectors coming out of the power supply like the one shown and connect it to the rear of the hard drive in the power receptacle. This connector is also keyed so it can only plug in one way.
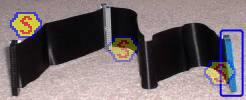
 Here's how the computer looks now with the CD-ROM, floppy drive and hard drive added. Of course, you really can't see a whole lot of them since they are inside their bays. Even so it's starting to look a bit cluttered inside, isn't it? Notice I've tried as much as possible to move the ribbon cables and power cords out of the air flow.