Computer Assembly - How To Assemble A PC
Second Boot
We now have the minimum set of core components installed to have a real, live, working computer so it will be very exciting if everything checks out ok.
Connect the monitor, mouse, keyboard, and power cord to the back of the computer. Insert the floppy containing the IBM Disk Fitness Test into the floppy drive. The computer defaults to booting first from the floppy drive, so the IBM Disk Fitness Test utility will be executed when we get that far if all goes well. As with the first boot, turn the monitor on and give it 10 seconds to warm up. And still leave the computer case off.
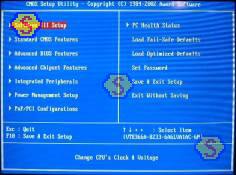
What we'll do is enter the BIOS and verify the drives have been detected. The ABIT KR7A-133 BIOS is entered by pressing the DEL key while the BIOS header screen is displayed. To make sure that my pressing of the key does not go undetected by the computer, I typically tap the DEL key at the rate of about twice a second while the BIOS header screen is displayed until the "CMOS Utility Menu" with its striking blue background is displayed. Recall that the BIOS header screen is displayed immediately after the computer emits the single beep, so you can start tapping the "Delete" key as soon as you hear the beep. Note that different motherboards may use different keys to enter the BIOS.
Flip the power switch in back of the computer to the on position (set to 1 - one). This is it! Press the power button on the front of the computer case.
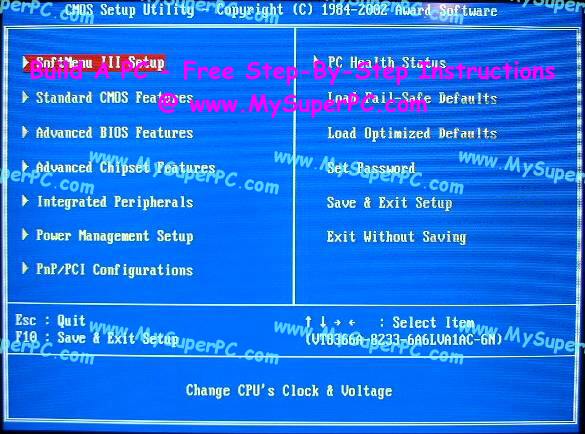
The computer should boot just as it did for the first boot. Enter the CMOS Utility Menu by pressing, or in my case tapping, the DEL key after the single beep is emitted and the BIOS header screen appears. The "Software III Setup" menu option is already highlighted on entering the CMOS Utility Menu. Press the "Enter" key.
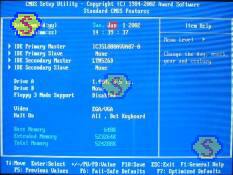
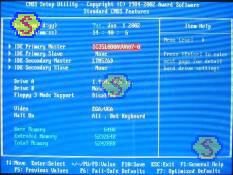
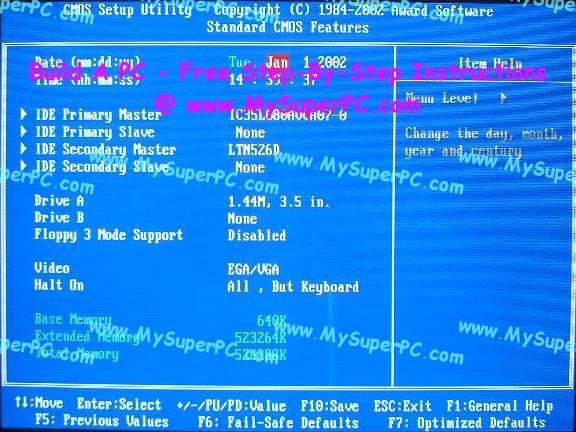
The "Standard CMOS Features" menu is displayed. Notice that "IDE Primary Master" and "IDE Secondary Master" show the values for the IBM 120GXP hard drive and Lite-On 52x CD-ROM, respectively. And notice that "Drive A" shows a value for the floppy drive. This is very good and should mean that all is well. Let's take a closer look at the hard drive values just to see what they show.
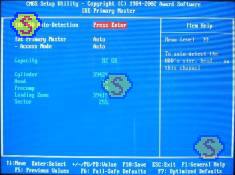
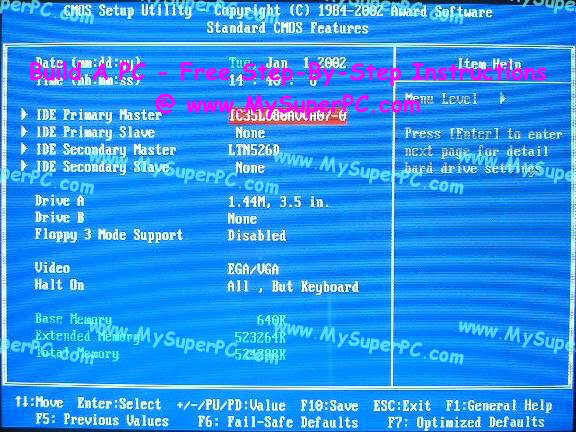
Use the arrow keys to cursor down and highlight the value for "IDE Primary Master". Press the "Enter" key.
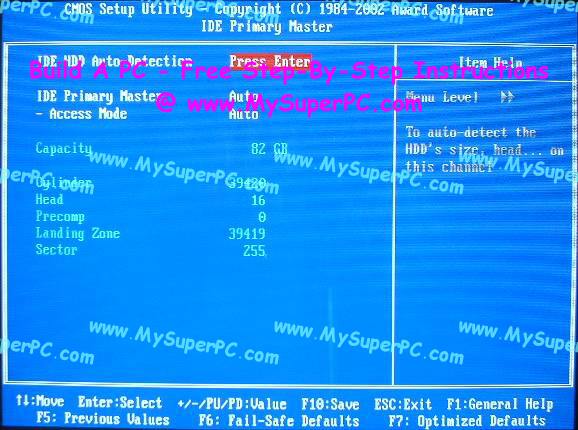
The "IDE Primary Master" menu should show the characteristics of the hard drive. If they don't look right then press the "Enter" key to invoke the "IDE HDD Auto-Detection". Or press the "Enter" key even if they do look right just to be sure.
Pressing the "Escape" key once gets back to the "Standard CMOS Features" menu. Use the arrow keys to navigate to the different values for the date and time. Use the numeric keypad plus "+" and minus "-" keys to change the values. When finished, press the "F10" key to save the values and exit the BIOS. The computer will re-boot. This time do not enter the BIOS. The computer will boot from the floppy drive, starting the IBM Disk Fitness utility.
The IBM Drive Fitness Test User's Guide is available along with the utility itself on the Hitachi Downloads And Utilities page (IBM and Hitachi have merged their storage technology divisions). It's very good so I won't repeat it here, but I strongly suggest you give it a look and make a hardcopy.
The IBM Drive Fitness utility offers several tests and I ran all the ones that looked relevant. First I ran the "Quick Test". It took only a minute or so and finished sucessfully. Second I ran the "Advanced Test" which took about 30 minutes and also finished successfully. These first two tests are read-only tests, so they make no changes to the hard drive. The third action I took was to perform an "Erase Disk". An "Erase Disk" does write to the disk so any previous contents are overwritten. Since the hard drive is blank as far as I'm concerned, that's ok by me. The "Erase Disk" took about an hour and finished successfully. Finally I ran an "Exerciser" test, indicating it should perform two loops. This took about 90 minutes to complete and also finished successfully. The new hard drive is "good".
Choosing to "Exit" The IBM Drive Fitness utility does not actually exit out of the utility, but takes you to a point where it states to "Please reboot your system now".
Congratulations! The second boot test has completed successfully! Both the floppy drive and hard drive have been well exercised by this test. The CD-ROM was detected and that's enough for now.
Back to My Super PC - Home Page
Skip Ahead
Back to My Super PC - Home Page
© 2001-2011, Rob Williams, all rights reserved.
|

|