Computer Assembly - How To Assemble A PC
Install the Video Card Drivers
The CD-ROM that comes with the video card can be used to install the video card drivers. These should be fine, but the ones I received would not load. I assume it's because I'm using Windows XP and the drivers provided on the CD-ROM are not compatible with it, but it doesn't matter. I'm just as happy to use the NVIDIA reference drivers anyway. They will be more up-to-date than whatever's on the CD-ROM. The latest NVIDIA reference drivers can be downloaded directly from NVIDIA. Once there, find the right drivers by first clicking on "Download Drivers". The video card drivers I need are the ones for Windows 2000/XP.
Selecting the "Download Drivers" option on the NVIDIA home page takes you to the download page for the current driver for your operating system. Once at the download page, you can download the latest driver.
The NVIDIA reference driver I used is version 30.82, with a Release Date of August 7, 2002, WHQL Certified, which I retrieved from the NVIDIA archive. It's about 10MB in size.
For a high-level overview of what's in each NVIDIA reference driver, including what WHQL means, see this GeForce FAQ: NVIDIA Driver Differences entry.
You might like to know that NVIDIA provides a nice set of Frequently Asked Questions (FAQ's). Each question opens up to it's own individual page. For example, here's one for
How do I install the NVIDIA Detonator drivers for Windows 95/98/ME/NT4/2000/XP.
But the tricky part now is to get the downloaded driver over to the new computer. Remember, there's no connection to the outside world, yet - no modem or anything. The answer turns out to be ZipCentral. You can use ZipCentral to copy a file that's too big to fit on a single floppy over multiple floppies, a process called "spanning".
The first step is to create a zip file, called an archive file, containing the downloaded driver file. Bring up ZipCentral. Under the File menu, select "New Archive...". Call the archive "bigfile" or whatever you want.
After entering the name for the archive, a "Add files and folders to current archive" window appears. Navigate to the downloaded driver file and double-click on it. ZipCentral processes the file into the archive. Under the File menu, select "Close archive".
Under the Tools menu, select "Write disk span...". A "Write disk span" window appears. In the "Single archive to span", browse and find the archive just created, "bigfile". Double-click on it. In "Location of the spanned files:", it's fine to use the default value of "A:\Spanned.zip". Click the "OK" button. ZipCentral will walk you through inserting each floppy disk into the floppy drive. The floppy disks should already be formatted and preferably blank. It took eight floppy disks to copy the NVIDIA reference driver I used.
Now take the handful of floppies over to My Super PC. Bring up ZipCentral. Insert the last floppy disk that was created into the floppy disk drive. Under the Tools menu, select "Read disk span...". Navigate to the floppy disk drive and double-click on "Spanned.zip".
The "Read disk span" window will show "Spanned.zip" as the entry for "Spanned archive to convert:". Use the "Browse" button for the "Put the single converted archive here:" entry to navigate to where the archive should go and enter the name to given to the single archive file, say "bigfile" again. ZipCentral will walk you through inserting each floppy disk into the floppy drive.
You can now treat bigfile.zip like any other zip-archive file. While still in ZipCentral, under the File menu, select "Open Achive...", select bigfile.zip and extract the contents as you would with any zip file. You now have the NVIDIA reference driver download file on the new computer.
To install the NVIDIA reference driver, double-click on the download file and follow the few, straight-forward prompts, using the default location when prompted for where to put the drivers. When the computer restarts, the drivers are installed. It's funny, but while the NVIDIA drivers were installing, I briefly say a window from the "Hardware Wizard" indicating it had found a Plug-n-Play device and it wanted instructions on where the monitor drivers could be found, but before I could react to the window and click on anything, the NVIDIA reference driver installation took over again and put up its own window indicating that I needed to restart the computer. I mention this in case you see the same thing and wonder about it. It's fine to restart the computer and install the monitor drivers with the next step after the computer restarts.
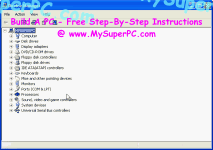
After the restart, things are looking much better. The computer is no longer sluggish and the images look crisp. The Device Manager looks fine now, too.
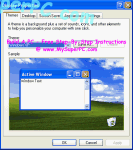
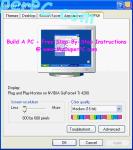
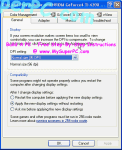
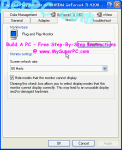
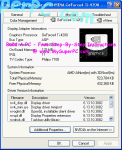
Navigating through the Display Properties as we did before shows much better results. The second picture shows the monitor is being recognized as "Plug and Play", which is an improvement, although it doesn't know yet exactly which one it is. The third picture now includes a tab for "GeForce4 Ti 4200", which is good since that's the type of video card installed. And the fourth picture of the Monitor tab shows the "Properties" button is no longer low-lighted, meaning we can click on it. That's good because that's what needs to be done to install the monitor driver
Clicking on the new "GeForce4 Ti 4200" tab shows this.
Back to My Super PC - Home Page
Skip Ahead
Back to My Super PC - Home Page
© 2001-2011, Rob Williams, all rights reserved.
|

|
