Computer Assembly - How To Assemble A PC
Connect The System Panel Cables
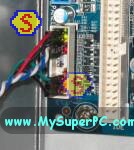
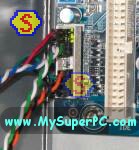
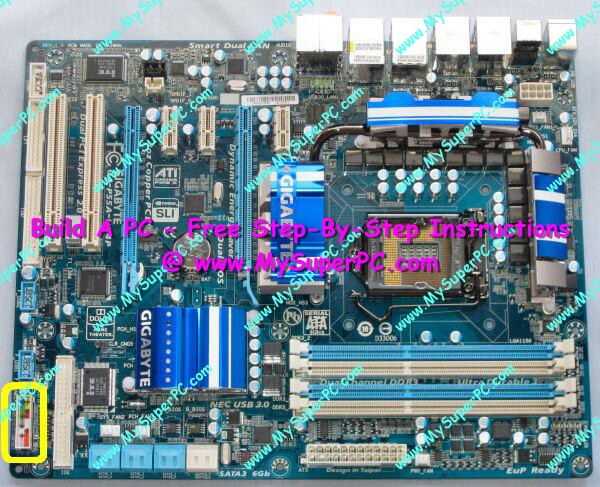
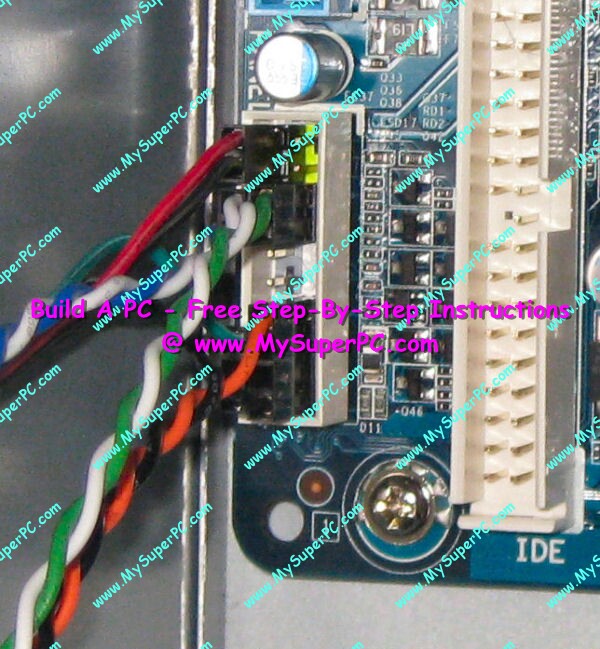
The computer case provides system panel cables that need to be connected to the system panel connectors on the motherboard. These cables make a connection between the computer case and the computer (via the motherboard). It is these cables that allow the power and reset buttons on the front of the case to work, the LEDs (one indicating the computer has power, the other indicating the hard drive is being accessed) on the front of the case to work, and the built-in speaker to work. The system panel connectors are located on the Gigabyte P55A-UD4P motherboard as shown circled in yellow in the lower-left corner.
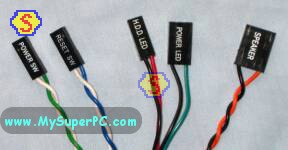
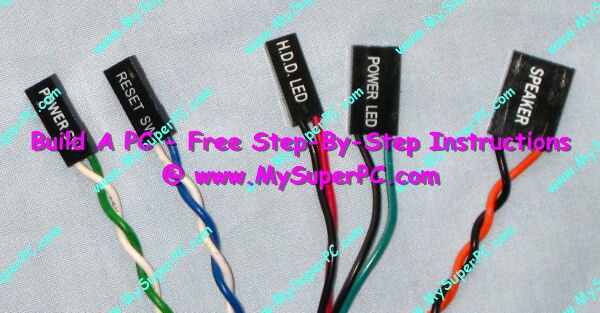
As can be seen in the picture below, there are five system panel cables that need to be connected into specific pin positions of the system panel connectors. The motherboard manual should be consulted for detailed information regarding the system panel connectors. The nasty thing about these cables is that they are not keyed, so they can be plugged in the wrong way around or on the wrong set of pins. The cables are POWER SW (for the power button on the front of the computer case), RESET SW (for the reset button on the front of the computer case), HDD LED (for the LED on the front of computer case that lights whenever the hard drive is accessed), POWER LED (for the LED on the front of the computer case) and SPEAKER (for the internal speaker - the one that just goes "beep").
Notice each cable has two wires. The black wire or white wire is ground and the colored wire is power.
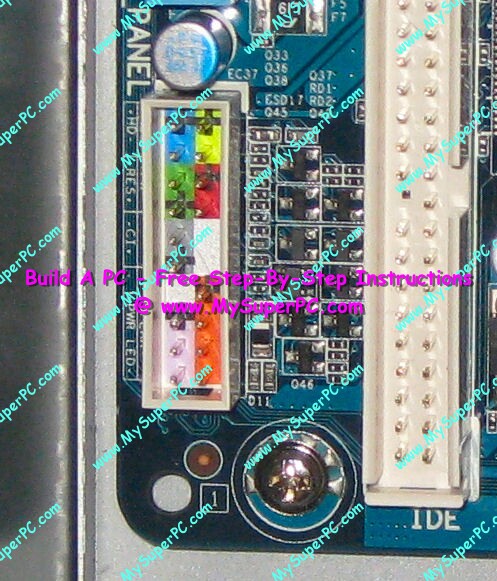
The motherboard manual will indicate which system panel connector pins are for each system panel cable, and will also indicate which pin is the pin for ground and power. The motherboard manual may describe the pin with ground as the "pull down", such as "Hard Disk LED pull-down" for the motherboard header HDD LED pins. Similarly, the pin with power may be described as the "pull-up", such as the "Hard Disk LED pull-up".
It's a big help that the motherboard connector for the Gigabyte P55A-UD4P motherboard color codes each set of pins, and also includes a large plus sign on the pin that takes the positive connection. There is also very tiny lettering down the side of the motherboard connector which illustrates where each cable should be plugged in the connector.
As it turns out, only the LED's are a problem if their cables are connected the wrong way around. The LED's are diodes, so they have polarity. If you have an LED cable on the right pins, but the wrong way around, then the LED won't light up. It won't hurt anything, though. For the LED to work, line up the black wire on the cable connector with the motherboard header pin identified as ground (GND, or pull-down). Two of the cables are for LED's, the POWER LED cable and the HDD LED cable.
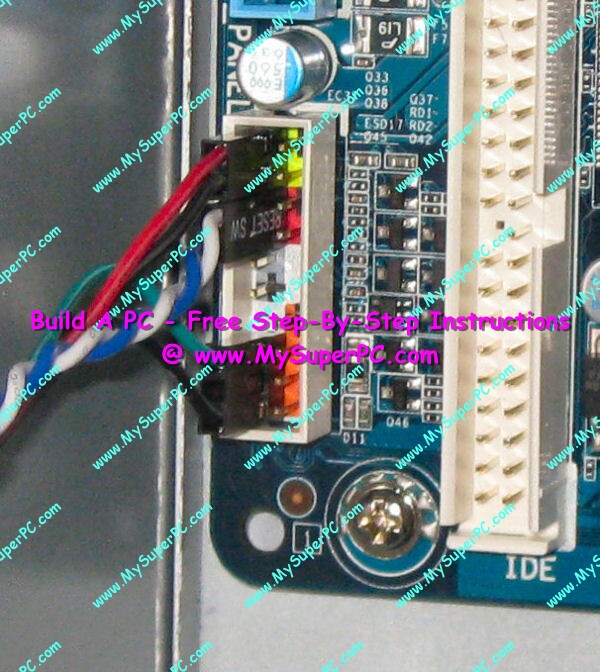
The other three cables, POWER SW, SPEAKER and RESET SW, can be connected either way. The motherboard manual may still identify one of the motherboard header pins for the connector as ground, but it will still work whether or not it is the black, ground wire that is connected to it. I have verified this for myself. The power switch, reset switch, and speaker all worked with their corresponding cables connected either way. And I also verified that the LEDs do not work when their cables are connected the wrong way around. So for the RESET SW cable in particular, which has one black wire and one white wire, it doesn't really matter which one is ground. It has no polarity so it doesn't matter which way it is connected.
Knowing all this is quite a bit helpful. It means that if you at least get the cables on the right pins then that will be sufficient. Only the two cables for the LEDs could be the wrong way around, and that won't hurt anything. It just means the LED's won't work until the cable is turned around.
Plug each cable into its appropriate set of pin positions in the connector on the motherboard. This is a bit tedious because everything is so small and the connector is near the side of the case, but I managed with just my fingers. The first picture shows the cables for the leftmost set of pins plugged in. The second picture shows the cables for the rightmost set of pins plugged in.
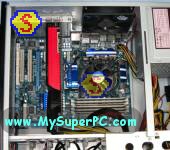
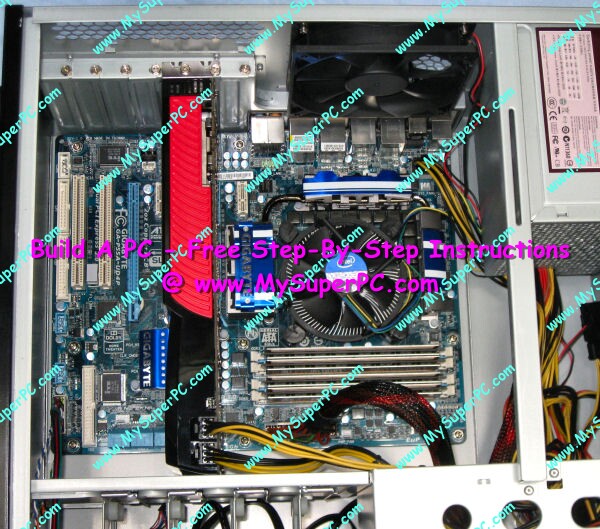
And here's how the computer looks assembled thus far. Everything we want installed inside of the computer for the first boot is in place.
Back to My Super PC - Home Page
How To Build A Computer. Step By Step Instructions To Assemble. Skip To Any Assembly Step.
Back to My Super PC - Home Page
© 2001-2015, Rob Williams, all rights reserved.
|

|
 Notice each cable has two wires. The black wire or white wire is ground and the colored wire is power.