Computer Assembly - How To Assemble A PC
Install The CPU Cooler
The installation of the CPU cooler for the Intel Core i7 processor is not difficult.
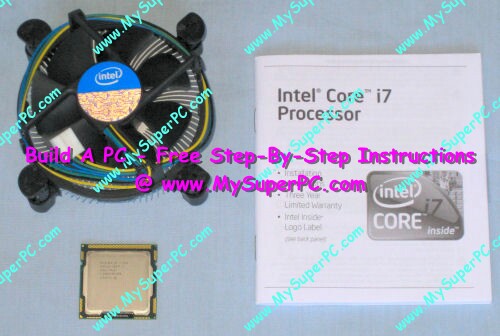
The contents of the Intel Core i7-860 processor includes a CPU cooler, shown in the upper-left. The processor itself is small and square-shaped, as shown in the lower-left.
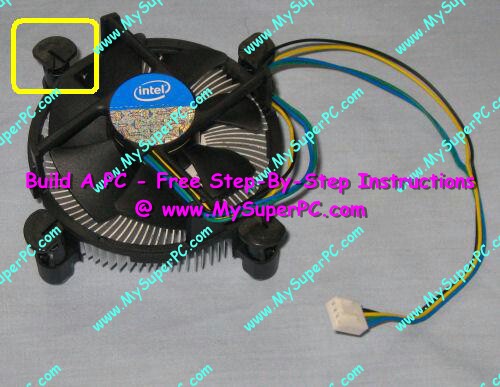
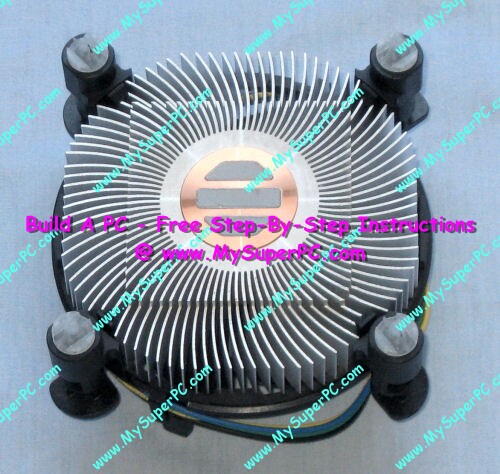
Uncoil the wire for the 3-pin connector. It's ok to leave excess wire secured around the CPU cooler, but make sure the wire is clear of the fan blades. The four locking posts at each corner should be in the unlocked position. The locking post in the upper right is circled. Notice the position of the arrow on the locking post in the adjacent picture.
Looking at the underside of the CPU cooler reveals three stripes of thermal compound that have been pre-applied.
Thermal compound is a grease that goes between the processor and CPU cooler so that heat is efficiently transferred from the processor to the heat sink of the CPU cooler, where it is dissipated with the aid of the fan on the CPU cooler. The thermal compound should not be removed and should be kept free of dirt and dust as much as possible.
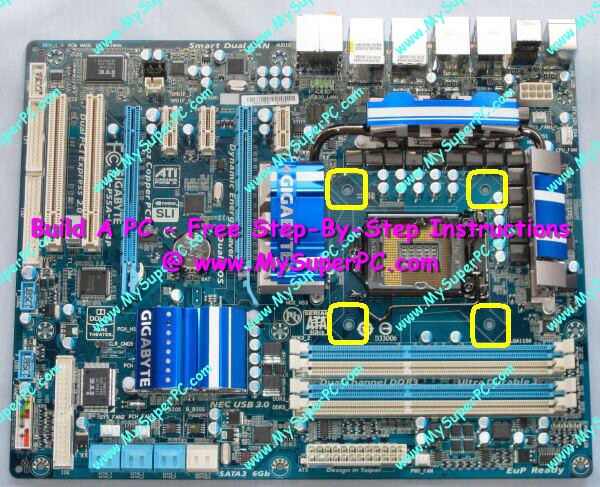
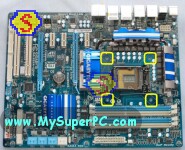
Align the four locking posts on the CPU cooler with the four locking post holes in the motherboard, shown circled. It doesn't matter how the CPU cooler is oriented since it's a square shape. But the wire from the 3-pin connector will run to the header on the motherboard, so consider orienting the CPU cooler to make an efficient path.
Push down on each locking post until it clicks, signaling the post has locked into place. It should make it easier if the first two locking posts to be pushed into place should are diagonal to each other. Notice the arrow on top of the mounting post is still in the unlocked position.
Using a flathead screwdriver, rotate each mounting post a quarter turn to lock it into place.
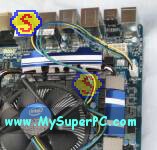
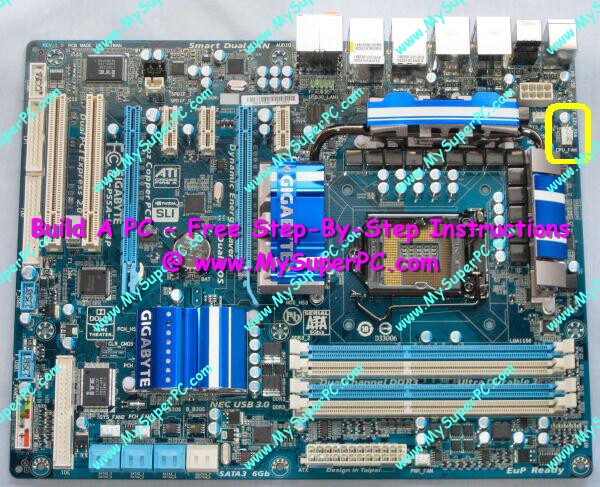
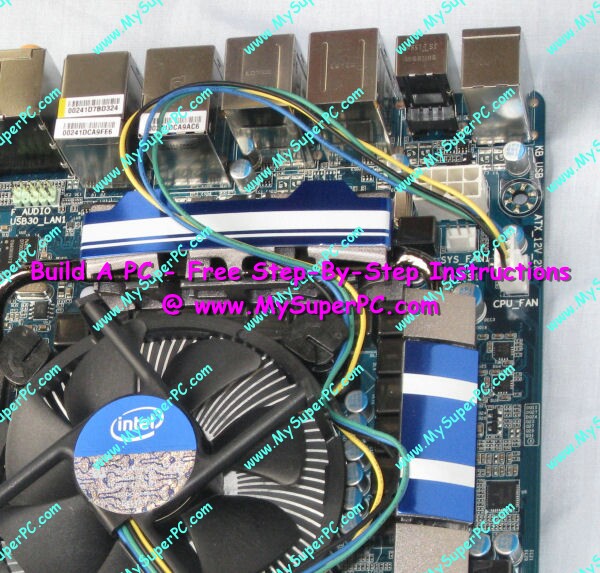
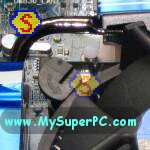
The final step is to connect the power connector of the CPU cooler for the fan to the motherboard. The fan connects to a 3-pin header on the motherboard. The motherboard usually has more than one of these. The one for the CPU cooler fan should be located near the processor socket as shown circled in the picture. It is usually labeled with something like "CPU_FAN" stamped on the motherboard next to the header.
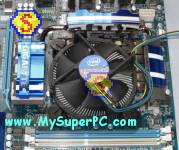
Uncoil the power connector cable from the back of the CPU cooler. The 3-pin header for the CPU cooler fan is labeled "CPU FAN" on the Gigabyte P55A-UD4P motherboard, as can be seen stamped on the motherboard. The 3-pin connector is keyed so it can only be plugged in one way.
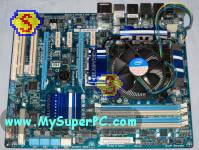
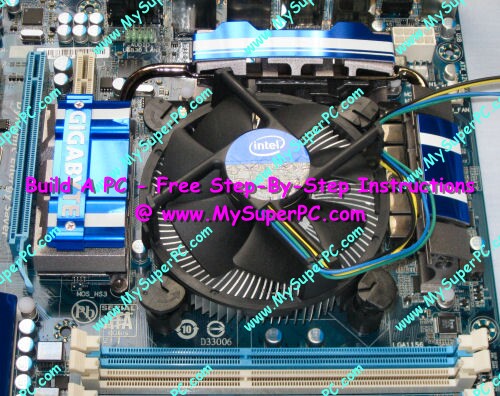
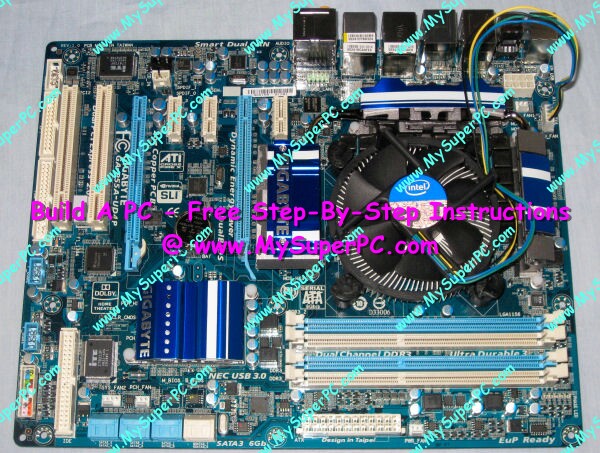
The CPU cooler is now securely mounted on the processor and connected to power via the motherboard. Here is how the motherboard looks now with the CPU cooler installed over the processor.
My complete recommendations for building a computer with quality components at unbeatable
prices is on my home page at
Build A Computer
Like My Super PC - Cost To Build A Computer. Here again are the recommendations for a motherboard!
| Description
| Where I Would Get It Today
| Today's Price
| Comments
|
| ASUS Z97-A LGA 1150 |
Amazon
|
$155.99 |
The Gigabyte GA-Z77X-UDH5 motherboard I'm using has outstanding quality and is a top performer.
Unfortunately, it's been discontinued. This ASUS motherboard is very similar and would be my choice today.
One difference is that the ASUS does not come with IEEE 1394, but it is cheaper and FireWire can be
added for low-cost with a plug-in card.
|
Bundles, Barebone Kits
|
| Motherboard Bundles |
TigerDirect
|
Varies |
Clicking the link takes you directly to the page for bundles and systems. All of the components in My Super PC were purchased separately so that I got exactly what I wanted. But if you come across a bundle you like then you can be sure that all of the components are compatible. Bundles typically include at least the processor and motherboard, but can include much more.
|
| Combo Deals |
Newegg

|
Varies |
Clicking the link takes you directly to the combo deals page. Once there you can search by category, such as "AMD Motherboards" and brand, such as "Gigabyte". |
|
Back to My Super PC - Home Page
How To Build A Computer. Step By Step Instructions To Assemble. Skip To Any Assembly Step.
Back to My Super PC - Home Page
© 2001-2015, Rob Williams, all rights reserved.
|

|


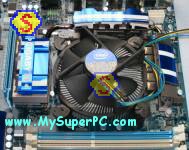
 Uncoil the power connector cable from the back of the CPU cooler. The 3-pin header for the CPU cooler fan is labeled "CPU FAN" on the Gigabyte P55A-UD4P motherboard, as can be seen stamped on the motherboard. The 3-pin connector is keyed so it can only be plugged in one way.
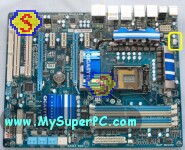 The CPU cooler is now securely mounted on the processor and connected to power via the motherboard. Here is how the motherboard looks now with the CPU cooler installed over the processor.