Computer Assembly - How To Assemble A PC
Second Boot
We now have the minimum set of core components installed to have a real, live, working computer so it will be very exciting if everything checks out ok.
Connect the monitor, mouse, keyboard, and power cord to the back of the computer (if you haven't done so already from following the previous Connect The Speaker page). As with the first boot, turn the monitor on and give it 10 seconds to warm up. And still leave the computer case cover off.
What we'll do is enter the BIOS when the computer boots. The Gigabyte P55A-UD4P BIOS is entered by pressing the "Delete" key while the BIOS header screen is displayed. To make sure that my pressing of the key does not go undetected by the computer, I typically tap the "Delete" key at the rate of about twice a second while the BIOS header screen is displayed until the "CMOS Utility Menu" is displayed. Recall that the BIOS header screen is displayed immediately after the computer emits the single beep, so you can start tapping the "Delete" key as soon as you hear the beep. Note that different motherboards may use different keys to enter the BIOS.
Flip the power switch in back of the computer to the on position (set to 1 - one). This is it! Press the power button on the front of the computer case.
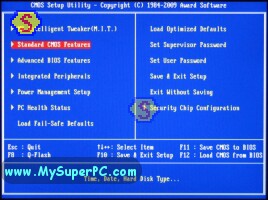
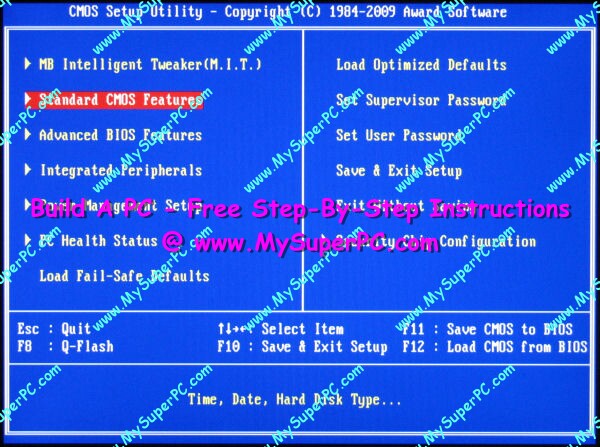
The computer should boot just as it did for the first boot. Enter the CMOS Setup Utility by pressing, or in my case tapping, the "Delete" key after the single beep is emitted. The main menu is shown on entering the CMOS Utility Menu. Cursor down to the "Standard CMOS Features" option. Press the "Enter" key.
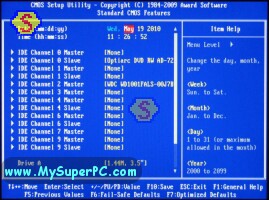
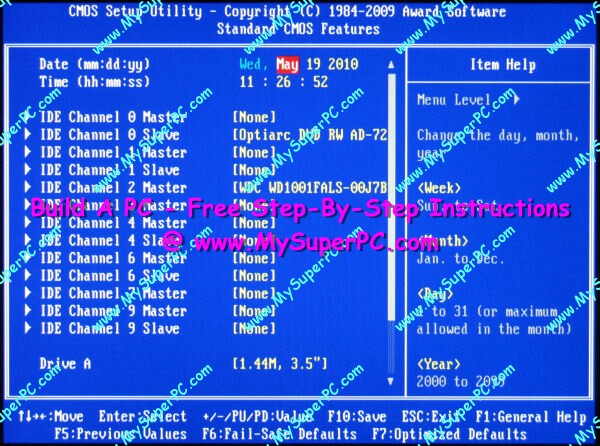
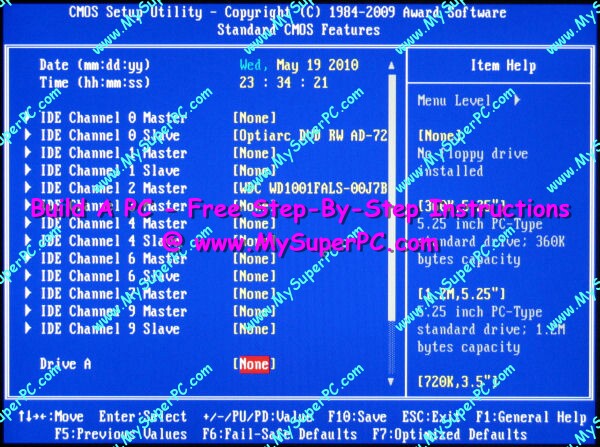
The "Standard CMOS Features" menu is displayed. Notice that both the Sony Optiarc optical drive and the Western Digital hard drive are shown as devices. The cursor is on the month field of the "Date". The values for the date and time can now be set. Use the up/down arrow keys to navigate between the fields in the "Date" and "Time". Use the numeric keypad plus "+" and minus "-" keys to change the values within each field, and use arrow keys to change fields.
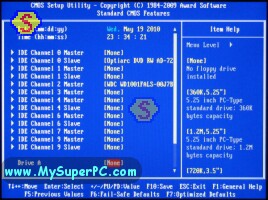
Now the date and time are correct. Notice that the setting for "Legacy Diskette A", which is the floppy drive, shows a value for the floppy drive. Use the down arrow to navigate to this field.
Using the plus "+" and minus "-" keys on the numeric keypad, change the value of the field to "None".
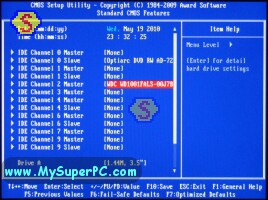
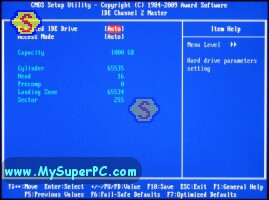
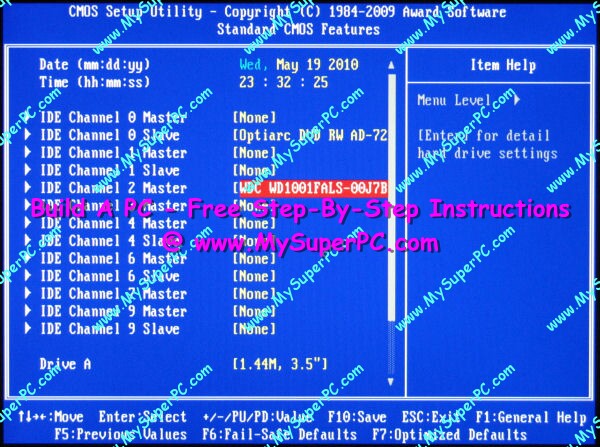
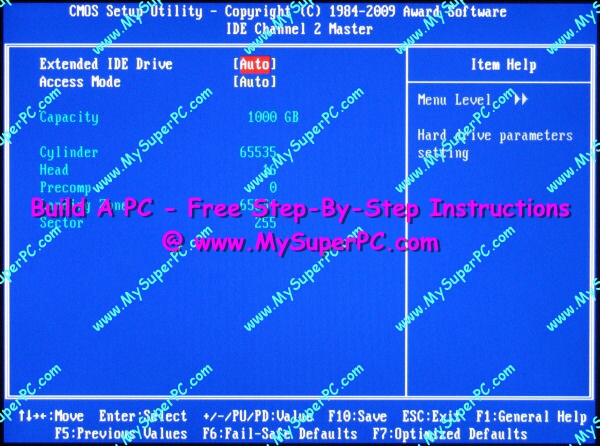
Use the down arrow to cursor to the entry for the hard drive. Press the "Enter" key.
The characteristics of the hard drive are shown.
Pressing the "Escape" key once gets back to the "Main" menu.
Common Problems
As I mentioned under first boot common problems, if something goes wrong with any installation of hardware then first you should double-check your install and verify that you did what you meant to do. Check that everything is plugged in, including the power connections for the devices. Verify that the First Boot setup, meaning without any of the drive devices connected, still works.
If the computer is getting power, meaning that the fans are spinning, but it's not getting to the BIOS header screen then try a Second Boot again, but having only one drive connected, either the SATA hard drive or the DVD RW drive. With each drive connected by itself, you should reach the BIOS header screen. If you do with one drive connected but not with the other drive connected then you know which drive is the one introducing the problem. It's possible that the drive itself or even the motherboard is faulty.
Back to My Super PC - Home Page
How To Build A Computer. Step By Step Instructions To Assemble. Skip To Any Assembly Step.
Back to My Super PC - Home Page
© 2001-2015, Rob Williams, all rights reserved.
|

|