Computer Assembly - How To Assemble A PC
The Processor, CPU Cooler and Thermal Compound
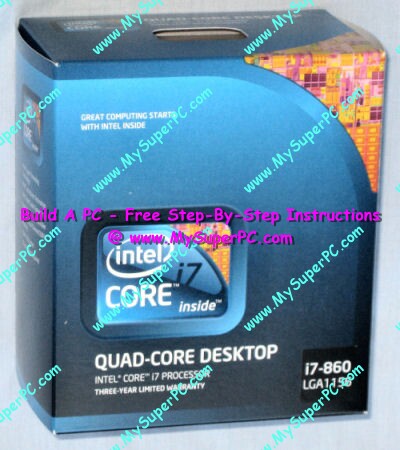
The Intel Core i7-860 processor. I purchased the retail box version of the processor, as shown below, which includes a CPU cooler with fan. Alternatively, a processor can be purchased as an OEM product. Typical processor OEM packaging is bubble wrap surrounding the processor enclosed in an antistatic bag with the processor inserted into a small foam square to protect the prongs. It's perfectly fine to purchase the processor either way. If purchased OEM then a CPU cooler also needs to be purchased.
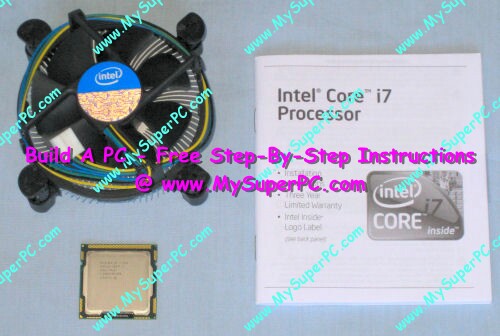
The contents of the Intel Core i7-860 processor includes a CPU cooler, shown in the upper-left. The processor itself is small and square-shaped, as shown in the lower-left.
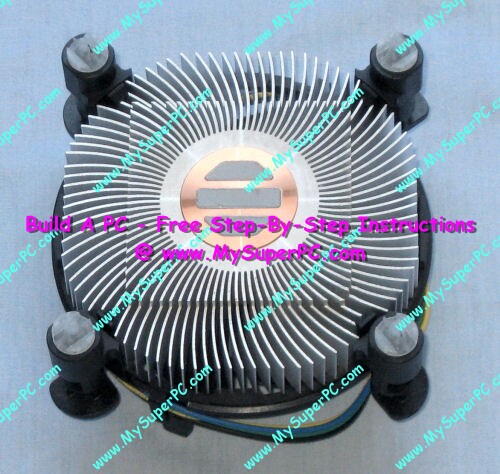
Looking at the underside of the CPU cooler reveals three stripes of thermal compound that have been pre-applied.
Thermal compound is a grease that goes between the processor and CPU cooler so that heat is efficiently transferred from the processor to the heat sink of the CPU cooler, where it is dissipated with the aid of the fan on the CPU cooler. The thermal compound should not be removed and should be kept free of dirt and dust as much as possible.
Back to My Super PC - Home Page
How To Build A Computer. Step By Step Instructions To Assemble. Skip To Any Assembly Step.
Back to My Super PC - Home Page
© 2001-2015, Rob Williams, all rights reserved.
|

|