My Super PC

Build A PC - How To Assemble

Computer Assembly - How To Assemble A PC

Test The SATA Hard Drive

If all went well then the computer re-booted from the floppy drive, starting the Data Lifeguard Diagnostics utility. This utility is available from the Western Digital Software Library page. I'm using the "DOS (floppy)" version for a "first generation Serial ATA WD Caviar" hard drive. 
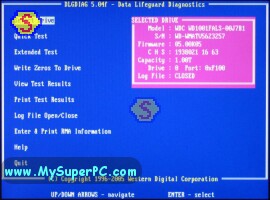
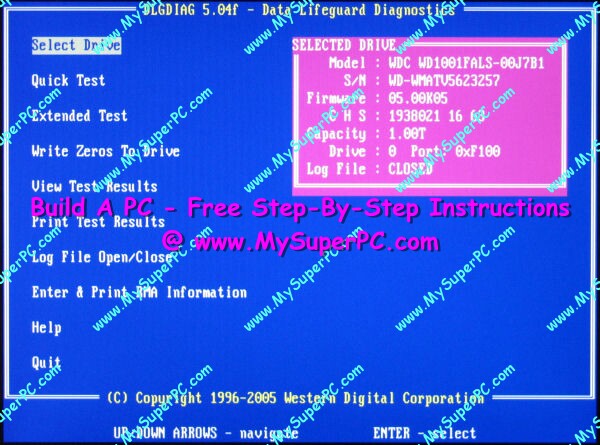
After the utility loads and after accepting the licensing agreement, the main menu screen appears and looks something like this. Click on the picture to see it enlarged.
How To Assemble A Computer - PC Assembly Guide, Western Digital Data Lifeguard Diagnostic main menu
The Data Lifeguard Diagnostic utility offers several tests and I ran all the ones that looked relevant. First I ran the "Quick Test". It took two minutes and finished successfully. Second I ran the "Extended Test" which took 46 minutes and also finished successfully. These first two tests are read-only tests, so they make no changes to the hard drive.

The next two tests are available under the "Write Zeros To Disk" option. The "Write Zeros To Disk" tests do write to the hard drive so any previous contents are overwritten. Since the hard drive is blank as far as I'm concerned, that's ok by me. After selecting the "Write Zeros To Disk" test, two options are presented. One is to do a "Quick Erase", which writes to a small portion of the hard drive. The other is to do a "Full Erase", which writes to the entire hard drive. The "Quick Erase" test took less than a minute and finished successfully. Finally I selected the "Full Erase" to check out the entire hard drive. This took about 90 minutes to complete and also finished successfully. The new hard drive is "good".

Choosing to "Quit" the Data Lifeguard Diagnostic utility takes you to a point where a message is displayed that says "The system must be reset - hit Ctrl-Alt-Delete or turn the power off". Remove the floppy disk containing the Data Lifeguard Diagnostic utility from the floppy drive.

Congratulations! The second boot test has completed successfully! Both the floppy drive and hard drive have been well exercised by this test. The optical drive was detected as we could see while in the BIOS and that's enough for now.

Common Problems

If the Data Lifeguard Diagnostic utility reports a failure as a result of any of its tests then the most likely reason is a bad hard drive. Although that's bad news it's certainly better to find out now, and was actually the point of running the test.

If the Data Lifeguard Diagnostic tests seem to be taking way longer than they should, like 16 hours for the "Full Erase", or appear to be stuck then the most likely reason is that the BIOS settings for the hard drive are not correct. See the BIOS settings listed under Integrated Peripherals on the Computer Assembly - Configure The BIOS Parameter Settings page.


Back to My Super PC - Home Page


How To Build A Computer. Step By Step Instructions To Assemble. Skip To Any Assembly Step.

  Parts List [go]
  Tools [go]
  Antistatic Wrist Strap [go]
  Computer Case and Power Supply [go]
  Motherboard [go]
  Processor, CPU Cooler and Thermal Compound [go]
  RAM - System Memory [go]
  Video Card [go]
  Monitor [go]
  Keyboard and Mouse [go]
  Floppy Drive [go]
  Hard Drive [go]
  CD-ROM, CD-RW, DVD RW [go]
  Sound Card and Speakers [go]
  Modem [go]
  Install the Processor onto the Motherboard [go]
  Install the CPU Cooler [go]
  Install the RAM - System Memory [go]
  Install the Motherboard into the Computer Case [go]
  Install the Video Card [go]
  Connect the Power Supply to the Motherboard [20-pin Connector  or  24-pin Connector]
  Connect the PN1 and PN2 Indicators to the Motherboard [KS-282 to EPoX 8RDA+  or  Sonata to MSI K8N Neo Platinum]
  Ready the Monitor [go]
  Ready the Keyboard and Mouse [go]
  First Boot [go]
  First Boot Common Problems [go]
  Install the CD-ROM, CD-RW, DVD RW Drives [go]
  Install the Hard Drive and Floppy Drive [PATA Hard Drive  or  SATA Hard Drive]
  Connect the Speakers (if using built-in sound) [go]
  Second Boot [PATA  or  SATA]
  Configure the BIOS Parameter Settings [EPoX 8RDA+  or  MSI K8N Neo Platinum]
  Test The Hard Drive [PATA  or  SATA]
  Install a Second SATA Hard Drive For RAID (optional) [go]
  Install the Operating System - Windows XP [on PATA hard drive  or  on SATA hard drive]
  Driver Installation [go]
  How To Copy Big Files From Another Computer Using Just a Floppy Drive [go]
  Install the Modem [go]
  Install the Motherboard Chipset Drivers [EPoX 8RDA+  or  MSI K8N Neo Platinum]
  Install the Monitor Driver [go]
  Install the Video Card Drivers [EPoX 8RDA+  or  MSI K8N Neo Platinum]
  Install the Sound Card and Speakers [go]
  Install System Information Utility - EVEREST [go]
  Diagnostic Test - DirectX [go]
  Speed Test - System Memory (RAM) Performance [go]
  Speed Test - Hard Drive Performance [PATA and SATA results]
  Speed Test - CD Performance [go]
  Speed Test - Total System Performance [go]
  Stress/Torture Tests [go]
  Connect Front Panel Ports For Audio, Firewire and USB 2.0 [go]
  Install Rear Panel Ports For Firewire And USB 2.0 [go]
  Install The Computer Case Fans [go]
  Post Assembly Needs [go]
  Graduation [go]
  Video Card Driver Settings [go]
  BIOS Flash Update [go]
  BIOS Settings [go]


Back to My Super PC - Home Page

© 2001-2008, Rob Williams, all rights reserved.
Building your own computer!  My Super PC - Click here when you're ready for the ultimate upgrade!  How to build an affordable, quality, fast PC!

My Tutorials
Build, Upgrade Help
Computer Memory Upgrade
Hard Drive Upgrade
Video Card Upgrade
My Super PC


Even More Help
MySuperPC Forums


Great prices on computer parts
Crucial
Crucial UK & Europe
Newegg
PCMicroStore
TigerDirect
ZipZoomFly


Great software prices
Amazon


Deals and Rebates
Dell Specials
Newegg Rebates
TigerDirect AMD Bundles
TigerDirect Intel Bundles
ZipZoomFly Rebates


Who I Use For Hosting
iPowerWeb


Buy The Book!
These assembly pages in book form!
Info