Computer Assembly - How To Assemble A PC
Install The SATA Hard Drive
The next boot test will be done after the drives are installed, namely the hard drive and optical drive, such as a DVD RW drive. Most computers do not need more than this. A single hard drive provides a vast amount of storage space. And the DVD RW drive handles both DVD's and CD's.
Unplug everything from the rear of the computer, including the power cord, monitor cable, keyboard cable, and mouse cable.
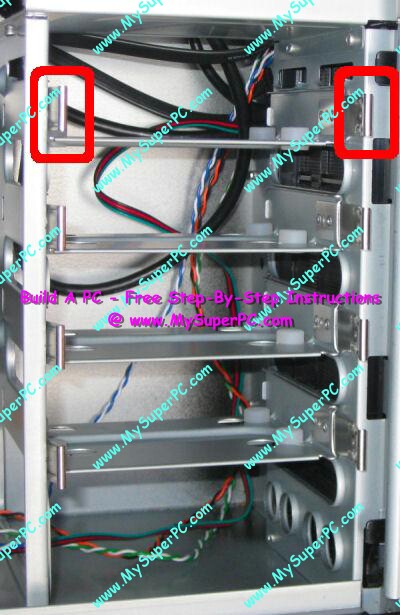
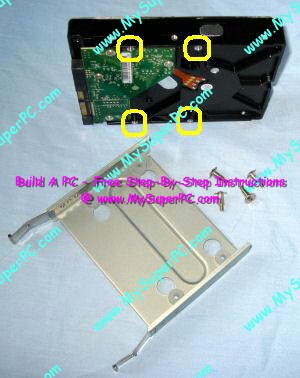
The Antec Sonata 3 computer case has room for four internal 3.5 inch internal hard drives. Remove one of the drive trays by squeezing the two locking clips together and sliding the tray out.
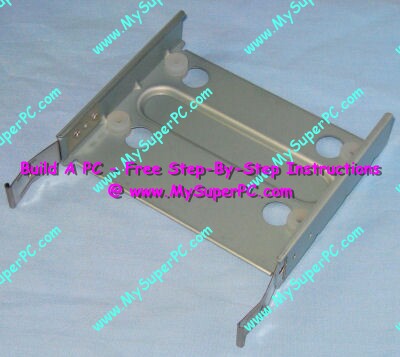
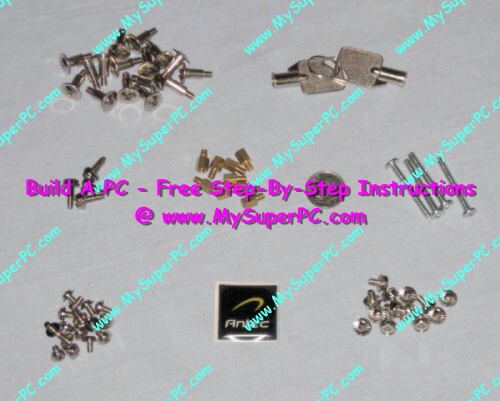
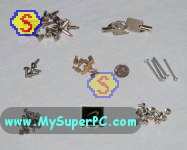
The hard drive fastens to the tray at the black rubber washers. The rubber washers help keep the computer quiet by dampening the hard drive vibration. Use four of the hard drive mounting screws that came with the Antec Sonata 3 computer case, as shown in the upper left of the second picture.
The tray attaches to the hard drive through the bottom of the tray. The screws are inserted through the bottom of the tray through the rubber washers and into the hard drive. The hard drive holes for the screws are on the bottom of the hard drive and are circled in yellow in the picture below.
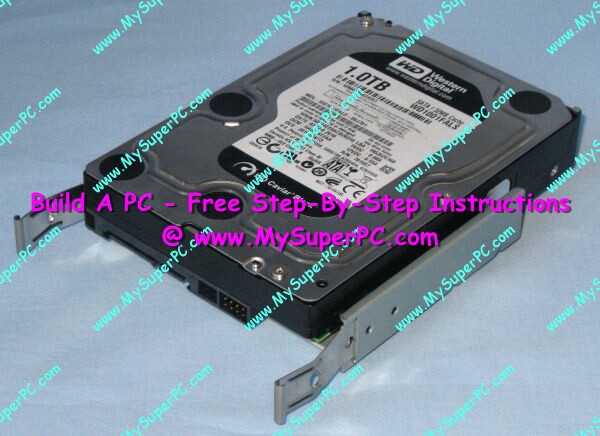
The tray can be attached the other way around, so the rear of the hard drive faces away in the picture. The advantage with doing it as shown is that the connectors on the rear on the drive are easy to access once the hard drive tray is reinserted back into the bay. There is an advantage to doing it the other way, too, which is that the cables run much less cluttered if they connect on the far side of the drive. You'll see what I mean more clearly shortly when the drive tray is reinserted back into the computer. Either way you do it is fine, just personal preference.
Slide the hard drive tray back into the bay until it clicks into place.
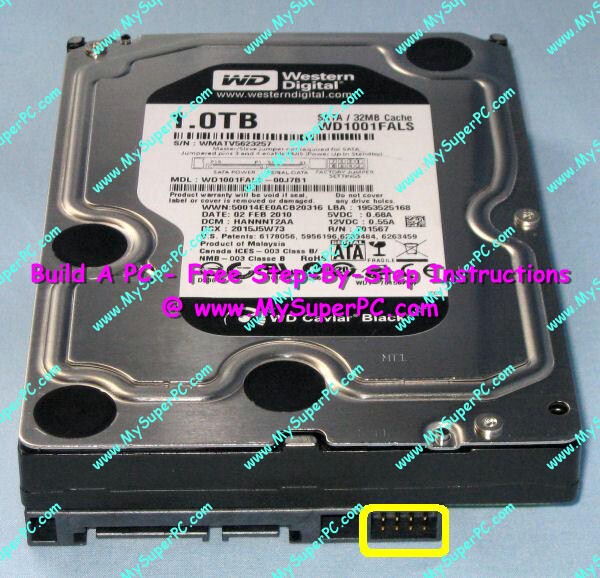
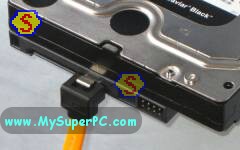
The connector circled is the SATA hard drive power receptacle for the power connector.
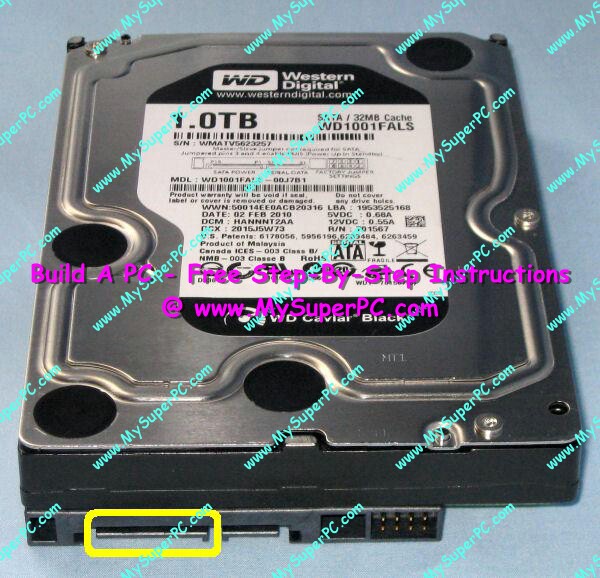
The connector circled is the connector for the SATA cable.
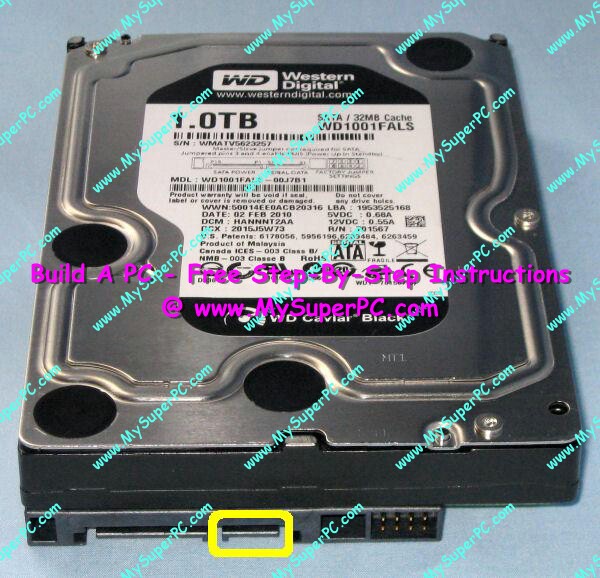
Circled are the jumper pins. No jumper is needed to change the hard drive configuration.
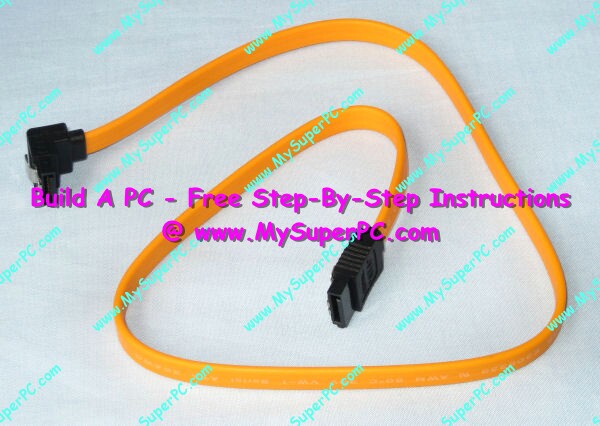
The Gigabyte P55A-UD4P motherboard comes with SATA cables like the one shown below in the first picture. Plug one end of the cable - it doesn't matter which end, but a right-angle end works well on the back of the hard drive - into the back of the SATA hard drive at the connector circled in red in the previous picture. The connector is keyed so it can only be plugged in one way.
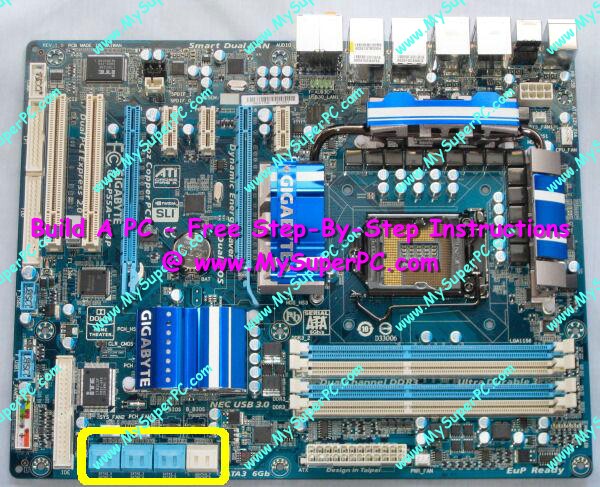
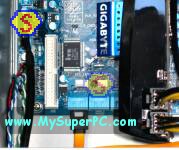
There are eight SATA connectors on the Gigabyte P55A-UD4P motherboard, six SATA 3Gb/s and two SATA 6Gb/s. All eight are circled, arranged on the motherboard in four towers of 2 connectors each. The two SATA 6 Gb/s connectors are the rightmost tower in the picture.
Plug the other end of the SATA cable into the motherboard SATA header. The connection is keyed so it can be plugged in only one way. It doesn't matter which of the six SATA 3Gb/s headers is used, which is good because they are rather inconvenient to attach a SATA cable to given their proximity to the drive bays and video card. In fact, some of the SATA headers are actually under the video card.
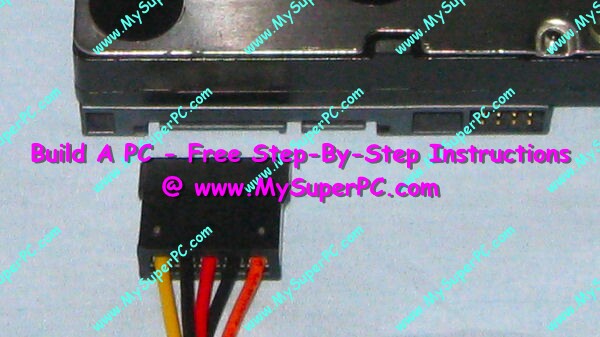
Select a SATA power connector from the bundle of power connectors coming out of the power supply like the one shown. The power connector is also keyed so it can only plug in one way. Notice the power cord can be used to power up to two SATA hard drives since it has two power connectors, one on the end of the cord and one partway back on the cord.
Plug the SATA power connector into the back of the SATA hard drive.
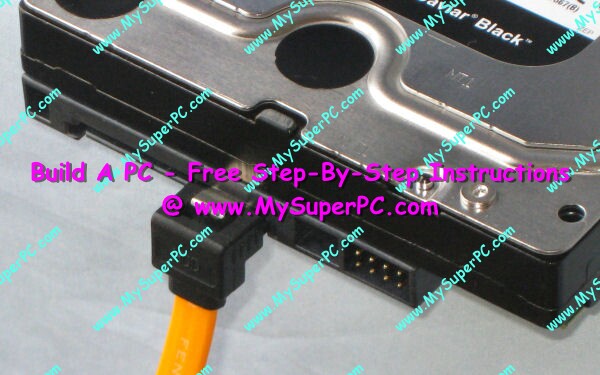
The back of the SATA hard drive now looks like this inside the computer case with these two connections made to the back of the drive.
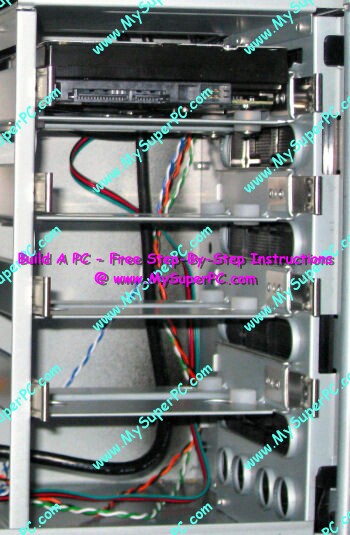
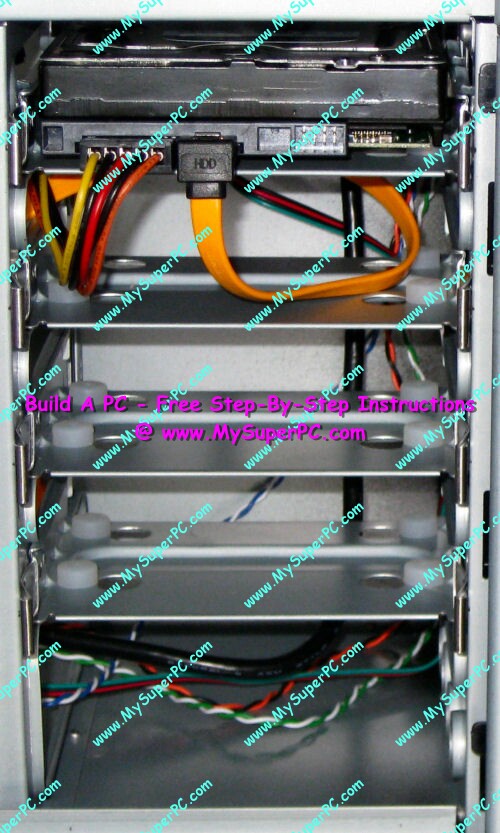
And here's how the interior of the computer case looks with these connections made and with the DVD RW optical drive and SATA hard drive installed. Things are starting to get a bit cluttered inside, aren't they? One thing to be mindful of is that data cables and power cables should be run in such a way as to minimize how much they interfere with airflow inside the case. This I've done with the ribbon cable for the DVD RW drive in particular. The cables for the other drives are much narrower and are much less of a concern in how they affect airflow.
My complete recommendations for building a computer with quality components at unbeatable
prices is on my home page at
Build A Computer
Like My Super PC - Cost To Build A Computer. Here again are the recommendations for a hard drive!
| Description
| Where I Would Get It Today
| Today's Price
| Comments
|
| Western Digital 1TB RE4 SATA 3 Gb/s 7200rpm SATA 3 |
Amazon
| $60.00 |
OEM version.
Serial ATA III hard drive.
Clicking the link takes you directly to it.
Plenty of storage with 1000GB. Quiet, reliable and very fast.
|
|
Backup Tips - Protect Your Valuable Data.
|
| Westerm Digital 1 TB External Hard Drive |
Amazon
| $54.99 |
Free shipping!
Clicking the link takes you directly to it.
This external hard drive connects to the computer via a USB port. Then copy over critical files periodically using software like SyncBack.
|
| 2BrightSparks SyncBack |
2BrightSparks
| Free |
Free download!
Clicking the link takes you directly to the download page. The freeware version is near the bottom of the page.
Use a freeware utility like SyncBack to schedule automatic copy operations to your backup hard drive.
SyncBackSE, a feature rich version, costs $30.
See the SyncBack version comparison chart for details.
|
| Online Backup |
Mozy

| Free |
Off-site backups give maximum backup protection. Mozy is free for under 2GB with no credit card required.
Unlimited backup space is available for $4.95 per month.
|
|
Back to My Super PC - Home Page
How To Build A Computer. Step By Step Instructions To Assemble. Skip To Any Assembly Step.
Back to My Super PC - Home Page
© 2001-2015, Rob Williams, all rights reserved.
|

|
 The tray attaches to the hard drive through the bottom of the tray. The screws are inserted through the bottom of the tray through the rubber washers and into the hard drive. The hard drive holes for the screws are on the bottom of the hard drive and are circled in yellow in the picture below.
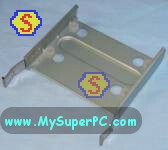
 The tray can be attached the other way around, so the rear of the hard drive faces away in the picture. The advantage with doing it as shown is that the connectors on the rear on the drive are easy to access once the hard drive tray is reinserted back into the bay. There is an advantage to doing it the other way, too, which is that the cables run much less cluttered if they connect on the far side of the drive. You'll see what I mean more clearly shortly when the drive tray is reinserted back into the computer. Either way you do it is fine, just personal preference.
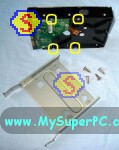 Slide the hard drive tray back into the bay until it clicks into place.
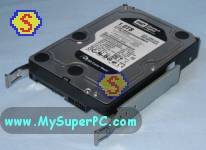 The connector circled is the SATA hard drive power receptacle for the power connector.
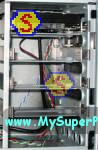 The connector circled is the connector for the SATA cable.
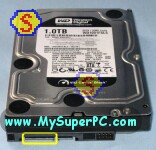 Circled are the jumper pins. No jumper is needed to change the hard drive configuration.
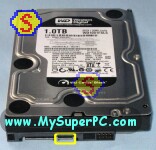 The Gigabyte P55A-UD4P motherboard comes with SATA cables like the one shown below in the first picture. Plug one end of the cable - it doesn't matter which end, but a right-angle end works well on the back of the hard drive - into the back of the SATA hard drive at the connector circled in red in the previous picture. The connector is keyed so it can only be plugged in one way.
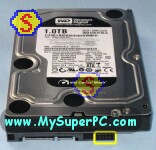 There are eight SATA connectors on the Gigabyte P55A-UD4P motherboard, six SATA 3Gb/s and two SATA 6Gb/s. All eight are circled, arranged on the motherboard in four towers of 2 connectors each. The two SATA 6 Gb/s connectors are the rightmost tower in the picture.
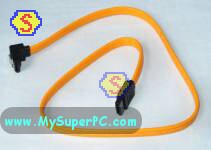
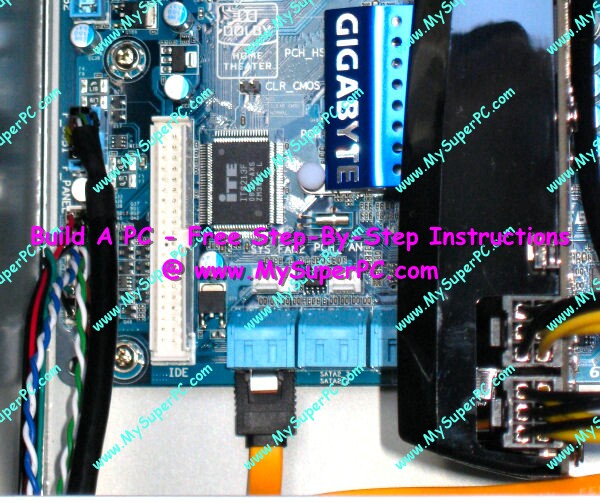
 Plug the other end of the SATA cable into the motherboard SATA header. The connection is keyed so it can be plugged in only one way. It doesn't matter which of the six SATA 3Gb/s headers is used, which is good because they are rather inconvenient to attach a SATA cable to given their proximity to the drive bays and video card. In fact, some of the SATA headers are actually under the video card.
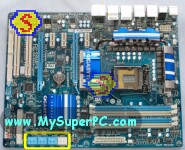 Select a SATA power connector from the bundle of power connectors coming out of the power supply like the one shown. The power connector is also keyed so it can only plug in one way. Notice the power cord can be used to power up to two SATA hard drives since it has two power connectors, one on the end of the cord and one partway back on the cord.
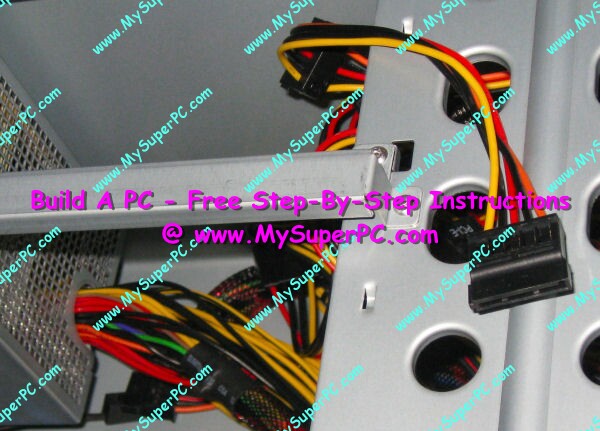
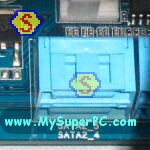
 Plug the SATA power connector into the back of the SATA hard drive.
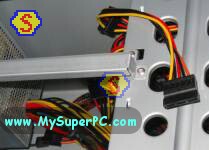 The back of the SATA hard drive now looks like this inside the computer case with these two connections made to the back of the drive.
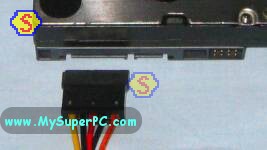 And here's how the interior of the computer case looks with these connections made and with the DVD RW optical drive and SATA hard drive installed. Things are starting to get a bit cluttered inside, aren't they? One thing to be mindful of is that data cables and power cables should be run in such a way as to minimize how much they interfere with airflow inside the case. This I've done with the ribbon cable for the DVD RW drive in particular. The cables for the other drives are much narrower and are much less of a concern in how they affect airflow.