Computer Assembly - How To Assemble A PC
Install The Video Card
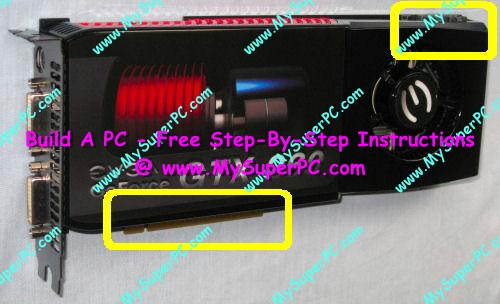
Here's a picture of the video card before it's installed. It's impossible to install the video card the wrong way around since the notches along the gold connectors (shown circled) key it with the PCI Express x16 slot. Plus it's clear that the end of the video card with the slot bracket is the end that goes next to the back of the computer case. As video cards have become more powerful, they have become more power hungry. It's becoming commonplace for high performance video cards to require some sort of direct connection to the power supply. The eVGA GeForce GTX 260 Core 216 has two power sockets for 6-pin PCI-E power connectors at the end of the card, circled in the upper right.
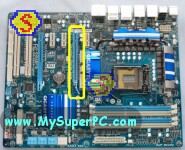
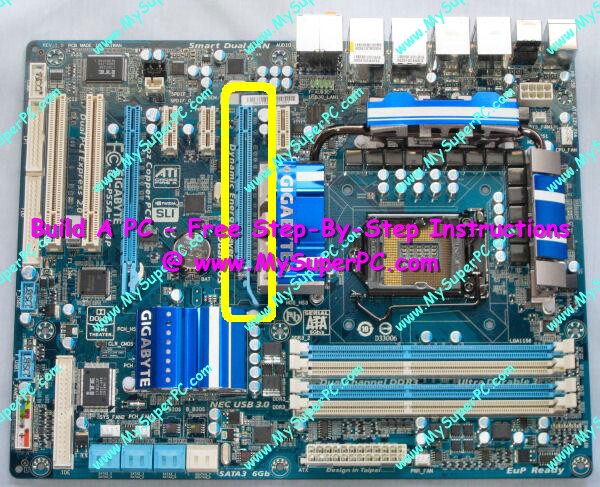
The video card installs into the PCI Express x16 slot of the Gigabyte P55A-UD4P motherboard. The PCI Express x16 slot is the blue slot shown circled in yellow.
Remove the slot covers on the rear of the computer case corresponding to the PCI Express x16 slot. In fact, two slot covers are used because, like many high-end video cards, the eVGA GeForce GTX 260 Core 216 video card is extra wide and actually covers the slot adjacent to the PCI Express x16 slot, which is a PCI Express x1 slot. This is quite common and not an issue. However, other video cards may need only one slot cover removed. Or, the video card may still be extra wide, covering the adjacent expansion slot, but not actually use both slot covers.
To insert the new video card into the PCI Express x16 slot, line up the gold edge connector and notches on the video card with the PCI Express x16 slot. Keep in mind the slot cover built onto the end of the video card will lay flush against the back of the computer, so it should not be too hard to get the video card properly aligned into the slot. Grasp the video card firmly by the corner and upper edge and push straight down and fully into the slot. An example of this is on my Video Card Upgrade - Insert The New Video Card page.
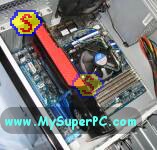
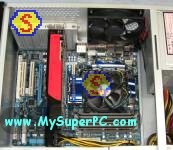
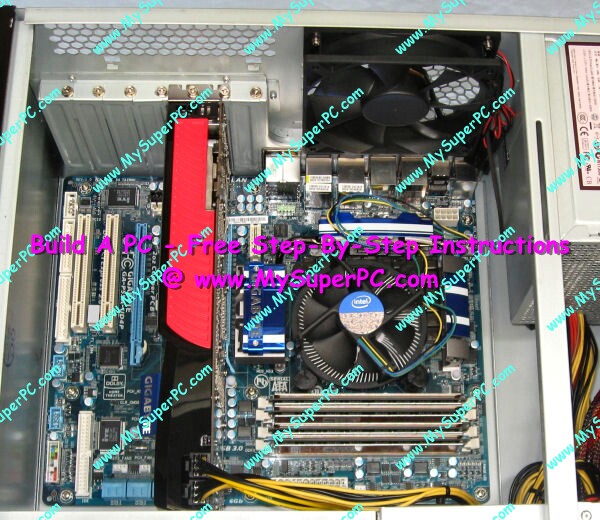
Use the slot cover screws to secure the card to the computer case, but don't over tighten as this can twist the card in the PCI Express x16 slot and cause it to be not completely connected inside the PCI Express x16 slot. Here's how the computer looks once the video card is installed, including with the slot cover screws in place.
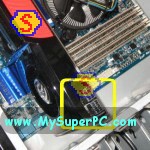
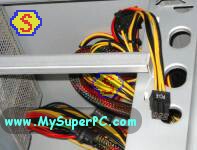
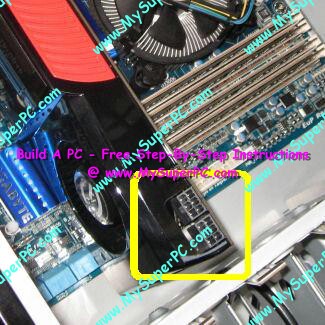
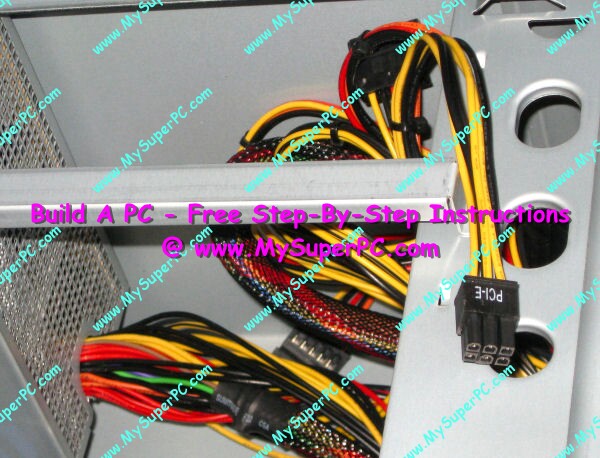
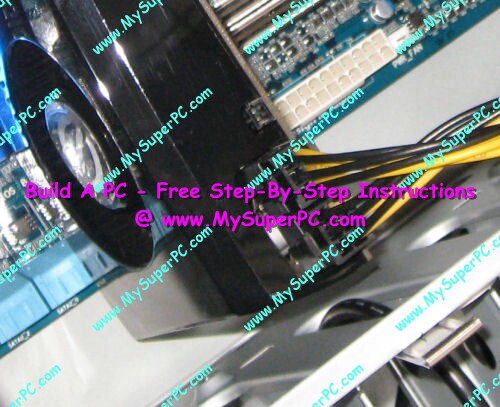
The two 6-pin PCI-E power socket on the video card can now be connected with PCI-E power connectors coming from the power supply. Find the power connector in the jumble of cables coming from the power supply. It is in the same shape as the socket and should be labeled PCI-E.
The PCI-E power connector is keyed so it can only be plugged into the video card one way. A clip on the power connector clicks into place to keep the power connector securely plugged in. If the power connector needs to be unplugged, squeeze the clip on the power connector while pulling on the power connector and it will easily slide out.
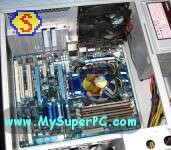
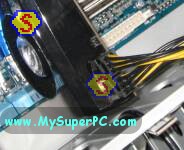
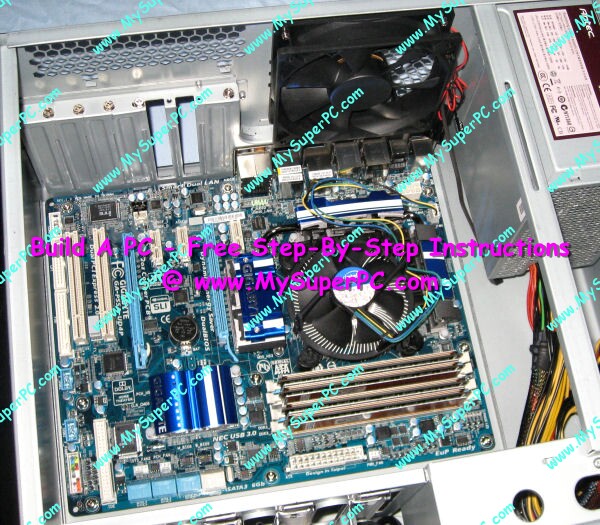
Here's how the interior of the computer case looks now with the video card installed.
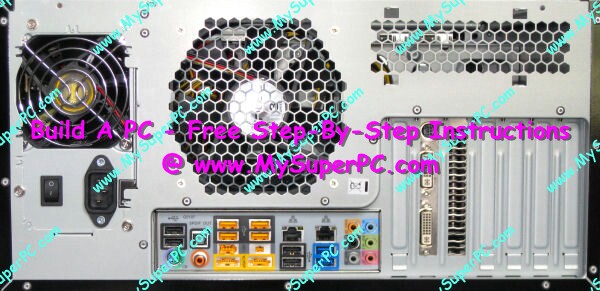
This picture of the back of the computer case shows how the two slot covers are used by the video card. The slot on the left has the input ports for the eVGA GeForce GTX 260 Core 216 video card. The slot on the right is simply used for video card fan exhaust.
My complete recommendations for building a computer with quality components at unbeatable
prices is on my home page at
Build A Computer
Like My Super PC - Cost To Build A Computer. Here again are the recommendations for a video card!
| Description
| Where I Would Get It Today
| Today's Price
| Comments
|
| eVGA GeForce GTX 960 2GB DDR5 |
Amazon
|
$209.99 |
Free shipping!
Retail box. Clicking the link takes you directly to it.
A GeForce GTX 960 video card like this one is great for demanding graphics environments, including digital video and top-tier gaming, without spending too much. Very quiet and powerful. DirectX 11 support built-in. PCI-E 3.0 compliant. SLI compatible. Fast DDR5 memory. Power supply of 400-watts or better recommended. Does use an extra slot. Uses one 6-pin power connectors from the power supply (the Antec Sonata III comes with this).
|
|
Back to My Super PC - Home Page
How To Build A Computer. Step By Step Instructions To Assemble. Skip To Any Assembly Step.
Back to My Super PC - Home Page
© 2001-2015, Rob Williams, all rights reserved.
|

|